How to Apply Heat Transfer Vinyl to a T-Shirt with an Automatic Heat Press
Are you a beginning crafter looking for an easy way to apply heat transfer to a t-shirt? Using an automatic heat press is the most efficient (and successful!) method – and it’s surprisingly simple too! In this blog post, we’ll be walking through step-by-step instructions on how to use a heat press. We’ll cover everything from setting up the shirt and pressing materials, all the way through the final assembly of your custom-designed t-shirt. So if you’re ready to take your crafting skills one step further with creative t-shirts that look good enough for retail sale, keep reading!
What is Heat Transfer Vinyl and Why Use it for T-Shirts
Heat Transfer Vinyl is a type of vinyl material that offers an excellent method to customize t-shirts and other fabric materials. As a crafting enthusiast or a trade professional, you can use it to add unique designs and motifs to your t-shirts.
It’s perfect for printing logos, graphics, and text designs on various fabrics through cutting and peeling the material. Heat Transfer Vinyl is a favorite among many because it is durable, long-lasting, and machine-washable. I love purchasing vinyl from HTV Ront because of their wide selection of iron on vinyl.
Additionally, it provides endless creative possibilities and can be used to make customized designs for various events such as family reunions, corporate events, or fundraisers. Overall, Heat Transfer Vinyl is an excellent choice for creating custom t-shirts for both recreational and commercial purposes.
Because each kind of vinyl is different, make sure to read the application instruction on the vinyl packaging.
Here are a few of the different types of vinyl you can use for your products:
- Glitter vinyl
- Metallic vinyl
- Matte vinyl
- Glossy vinyl
- Chameleon vinyl
- Patterned vinyl
- Puff vinyl (my current fave!)
If you’re wondering how to apply heat transfer vinyl (also called iron on vinyl), look no further than the Silhouette Cameo or the Cricut Maker. You can do a variety of crafts with a cutting machine such as t-shirts (like we are talking about in this article), making leather keychains, or even organizing your home to name a few.
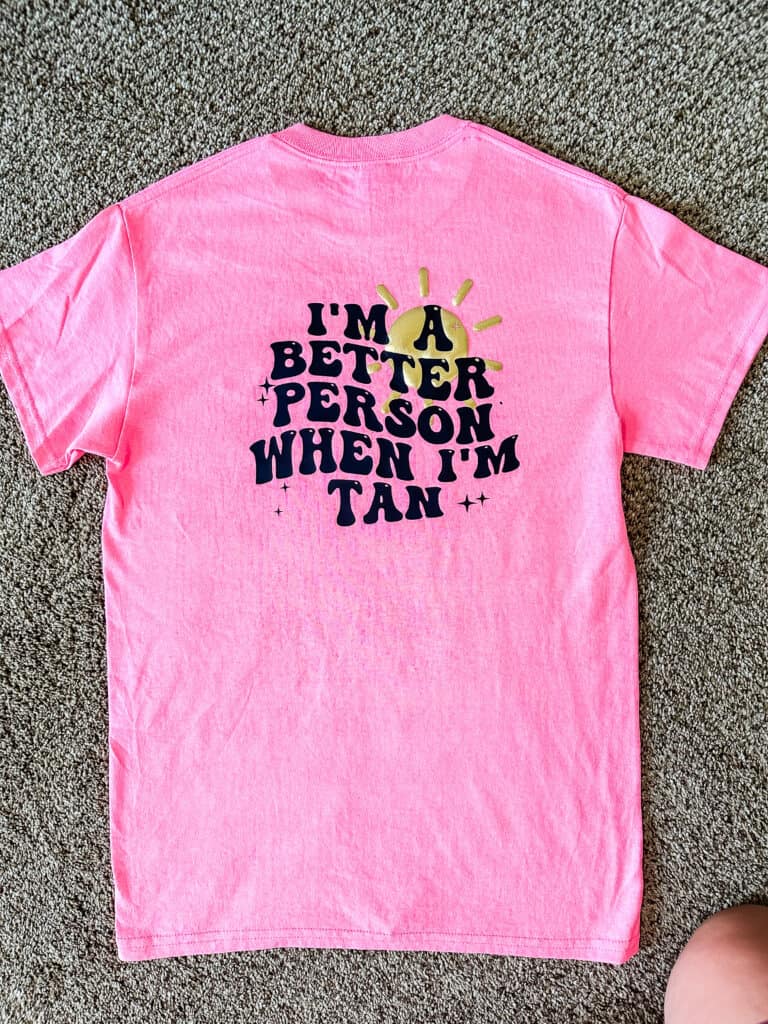
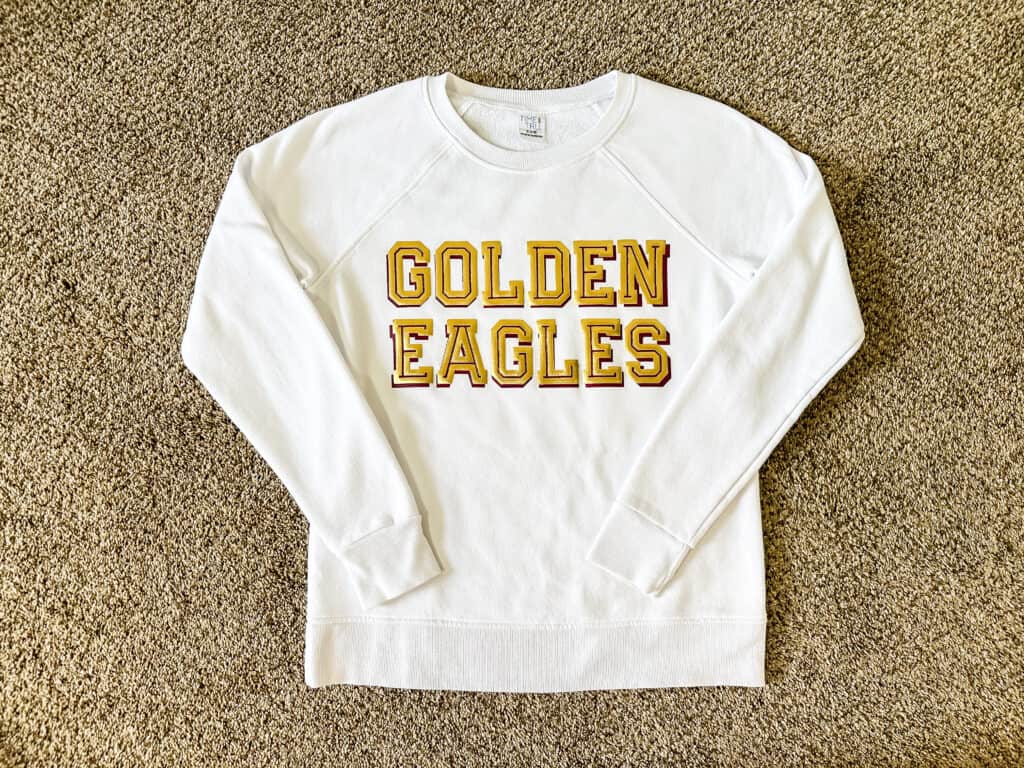
These are a few of the shirts that I made using heat transfer vinyl and my heat press!

Preparation for Applying Heat Transfer Vinyl to a T-Shirt
If you’re ready to create a custom t-shirt, preparation is key when it comes to applying heat transfer vinyl.
The first step is to ensure that your garment is clean and dry. Any dirt or moisture on the fabric can negatively impact the vinyl’s ability to adhere properly.
Next, make sure the vinyl is cut to the correct size and shape for your design. It’s important to remember that the entire design needs to be mirrored before it is cut so that it will appear correctly on the shirt.
Check your settings and do a test cut to make sure the cut settings are correct and that the material cuts well. Otherwise, you can waste a lot of iron on vinyl.
When you’re ready to apply the iron on vinyl, use a heat press or iron to affix it to the fabric. Make sure to follow the manufacturer’s instructions for the appropriate temperature and pressure settings according to the type of vinyl you are using.
With a little bit of preparation and attention to detail, you’ll have a professional-looking t-shirt in no time!
Step-by-Step Guide for Applying Heat Transfer Vinyl with an Automatic Heat Press
Applying heat transfer vinyl can seem like an intimidating task, but with an automatic heat press, it can be a breeze. Here are a few basic steps to get you started.
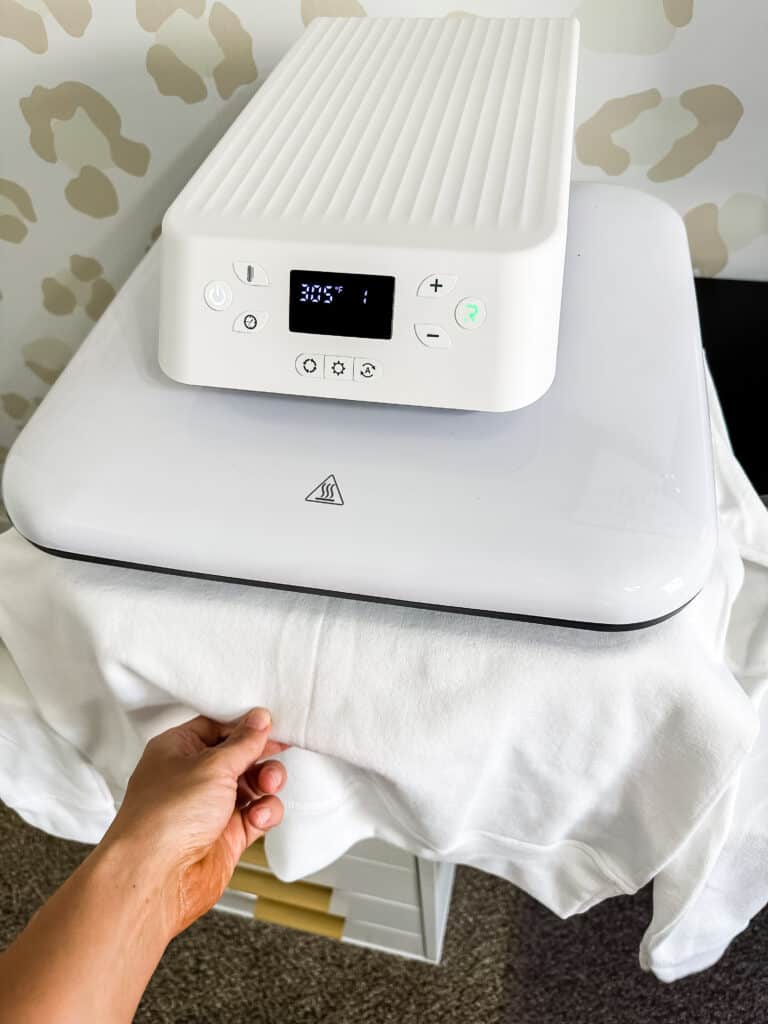
First, start by preheating the machine to the recommended temperature for the iron on vinyl and fabric you will be using.
Next, cut heat transfer vinyl and weed out any excess iron on vinyl. After that, place your fabric on the lower platen and position your vinyl on top. Make sure it is centered and straight.
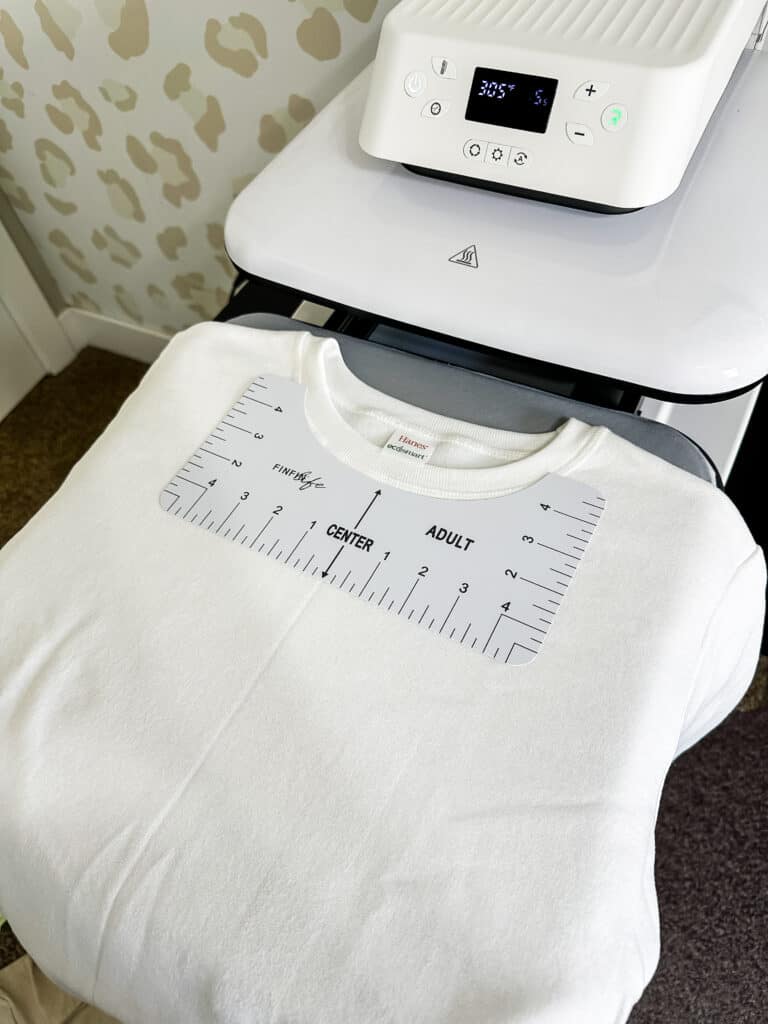

Close the press and let it do its work for the recommended time. Make sure to look at the specific instructions on the packaging for the type of material you are using. Asking Google what the settings should be, doesn’t necessarily work. I ruined some puff vinyl by doing this.
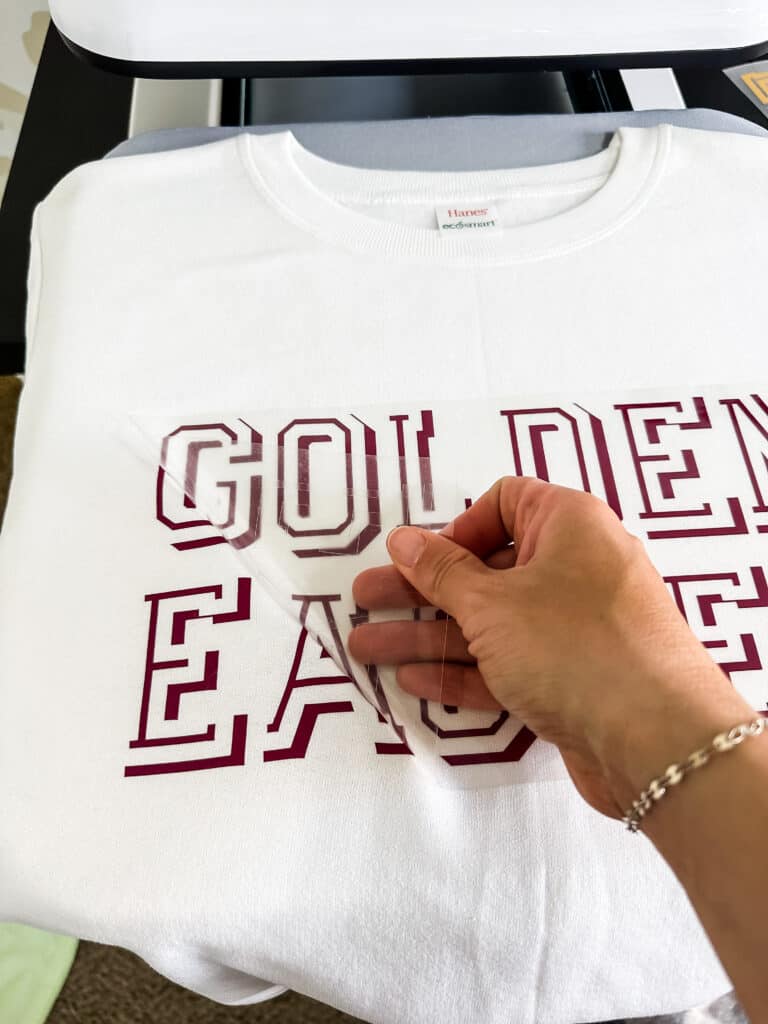
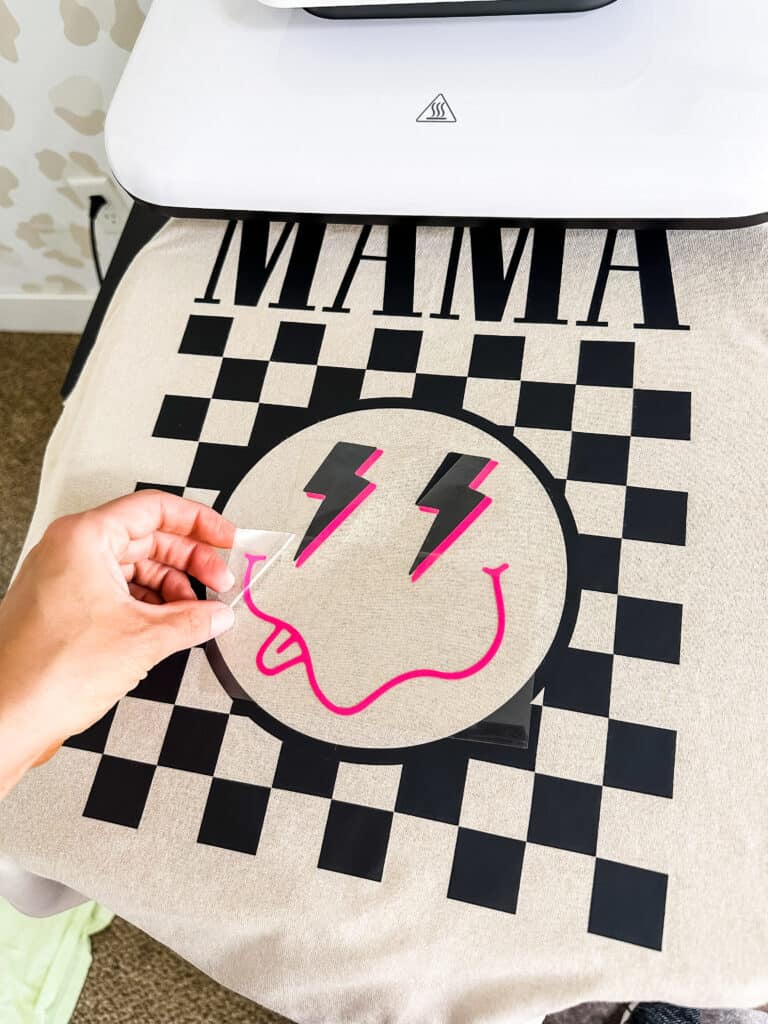
Open the press and peel off the transfer paper while the vinyl is still warm unless the vinyl instructions tell you to wait until the vinyl is cool.
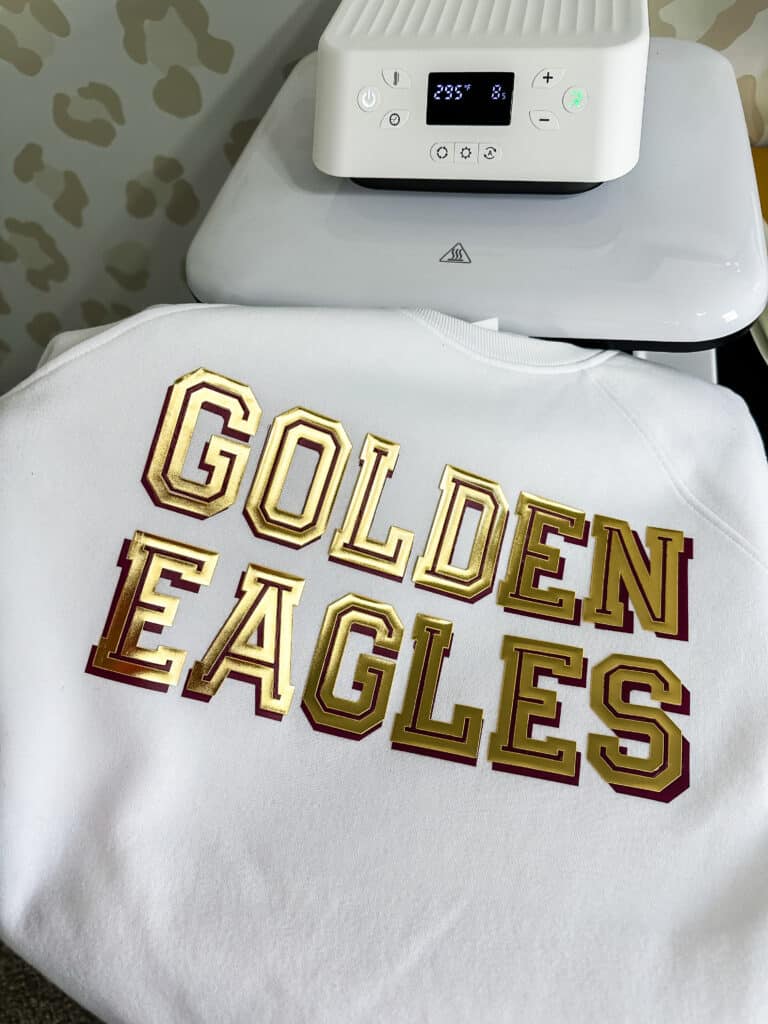
I chose to add a second layer of Gold Puff Vinyl to this shirt.
Finally, let the fabric cool completely before wearing or washing. With these easy steps, you’ll be able to create professional-looking designs on your clothing and other fabric items in no time.
Tips and Tricks for Working with Heat Transfer Vinyl On T-Shirts
Heat transfer vinyl is a popular choice for those looking to create custom t-shirts. However, for those who are new to working with it, it can be a bit intimidating. The good news is that there are a few tips and tricks that can make the process much easier.
First and foremost, it’s important to have the right equipment, including a good quality vinyl cutter.
You’ll also want to make sure that you choose the right type of heat transfer vinyl for your project and that you’re applying it correctly.
Another important consideration is the temperature and pressure of your heat press.
SVG FILES

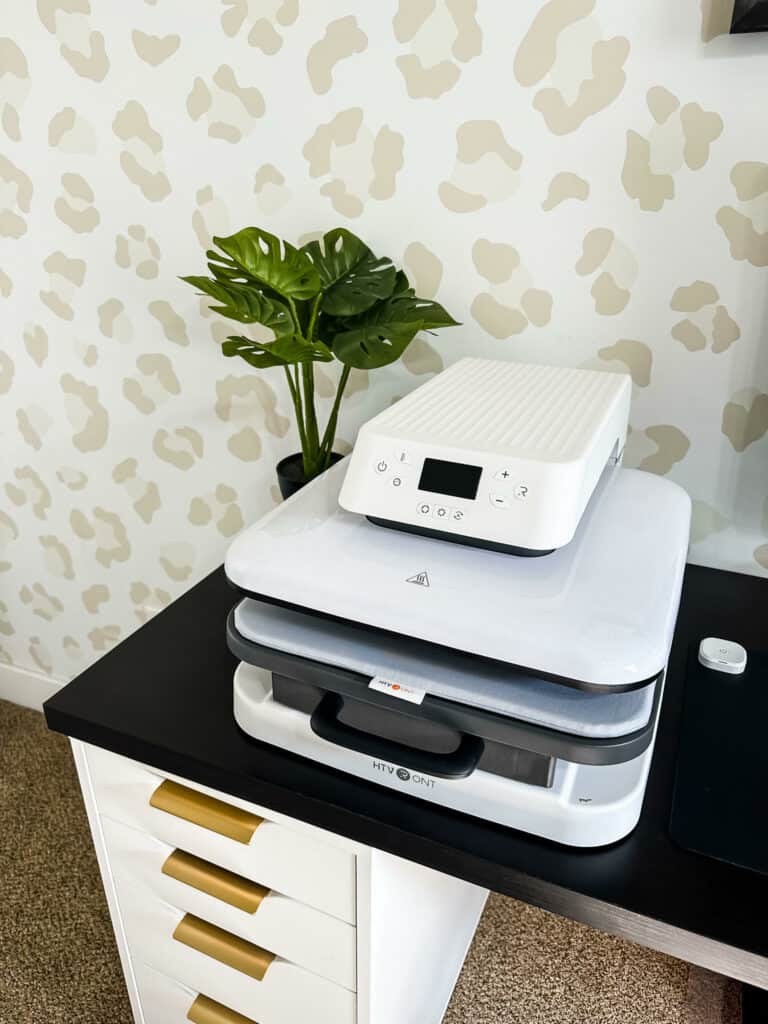
Tools Needed To Apply Heat Transfer Vinyl On T-Shirts
If you’re looking to add a little personal touch to your t-shirts, heat transfer vinyl is a great way to do so. However, before you jump right in, it’s important to have the right tools on hand. Firstly, you’ll need a cutting machine (I use a Silhouette Cameo) to create your design in the vinyl. Next, you’ll need a weeding tool to remove any excess vinyl from your design.
A heat press or iron will be needed to apply the vinyl onto your t-shirt. It’s important to note that using a heat press will give you better and more long-lasting results. Finally, a Teflon sheet can be used to protect both your vinyl and your t-shirt from damage during the heating process. Once you have all of the necessary tools, you’ll be able to create unique and personalized t-shirts that are sure to make a statement.
Troubleshooting Common Problems When Applying Heat Transfer Vinyl to a T-Shirt
Applying heat transfer vinyl to a t-shirt is a popular method for creating unique and personalized garments. However, even the most experienced DIY enthusiasts encounter common problems during the process. One issue could be insufficient transfer pressure, causing the vinyl not to stick to the fabric properly.
Uneven heating might also lead to uneven transfer, making the garment appear unprofessional. And of course, we’ve all experienced the dreaded vinyl peeling after washing.
The good news is that these problems are easily avoidable with a little troubleshooting and attention to detail. By ensuring proper pressure and temperature, and following simple washing instructions, your heat transfer vinyl designs will look flawless on your t-shirts.
With a few simple steps and the right tools, anyone can apply heat transfer vinyl onto t-shirts like a pro. In addition to being affordable, applying heat transfer vinyl is very convenient, allowing you to quickly and easily add designs and patterns to t-shirts for personal use or resale in a retail setting.
Before you begin your crafting journey with heat transfer vinyl, however, it’s important to become familiar with what the material is made of and how to properly prepare and apply it.
Overall, heat transfer vinyl is a great way to personalize clothing items that have been produced by a machine, such as sweaters and tees! For less experienced users just getting started with their t-shirt projects using heat transfer vinyl, following this step-by-step guide was designed to help ensure successful results.
If you follow these guidelines carefully, you’ll be one step closer to creating stunning custom garments.