How to Label Your Home with a Cricut Machine
If you’re looking for a way to make labeling your home easier, a Cricut machine is the answer. With this handy tool, you can quickly create labels for all of your shelves, drawers, and containers.
In this post, we’ll tell you all about Cricut machines and why they are perfect for creating labels. We’ll also provide some tips on how to use a Cricut to make the best-looking labels possible. So if you’re ready to get organized, read on!

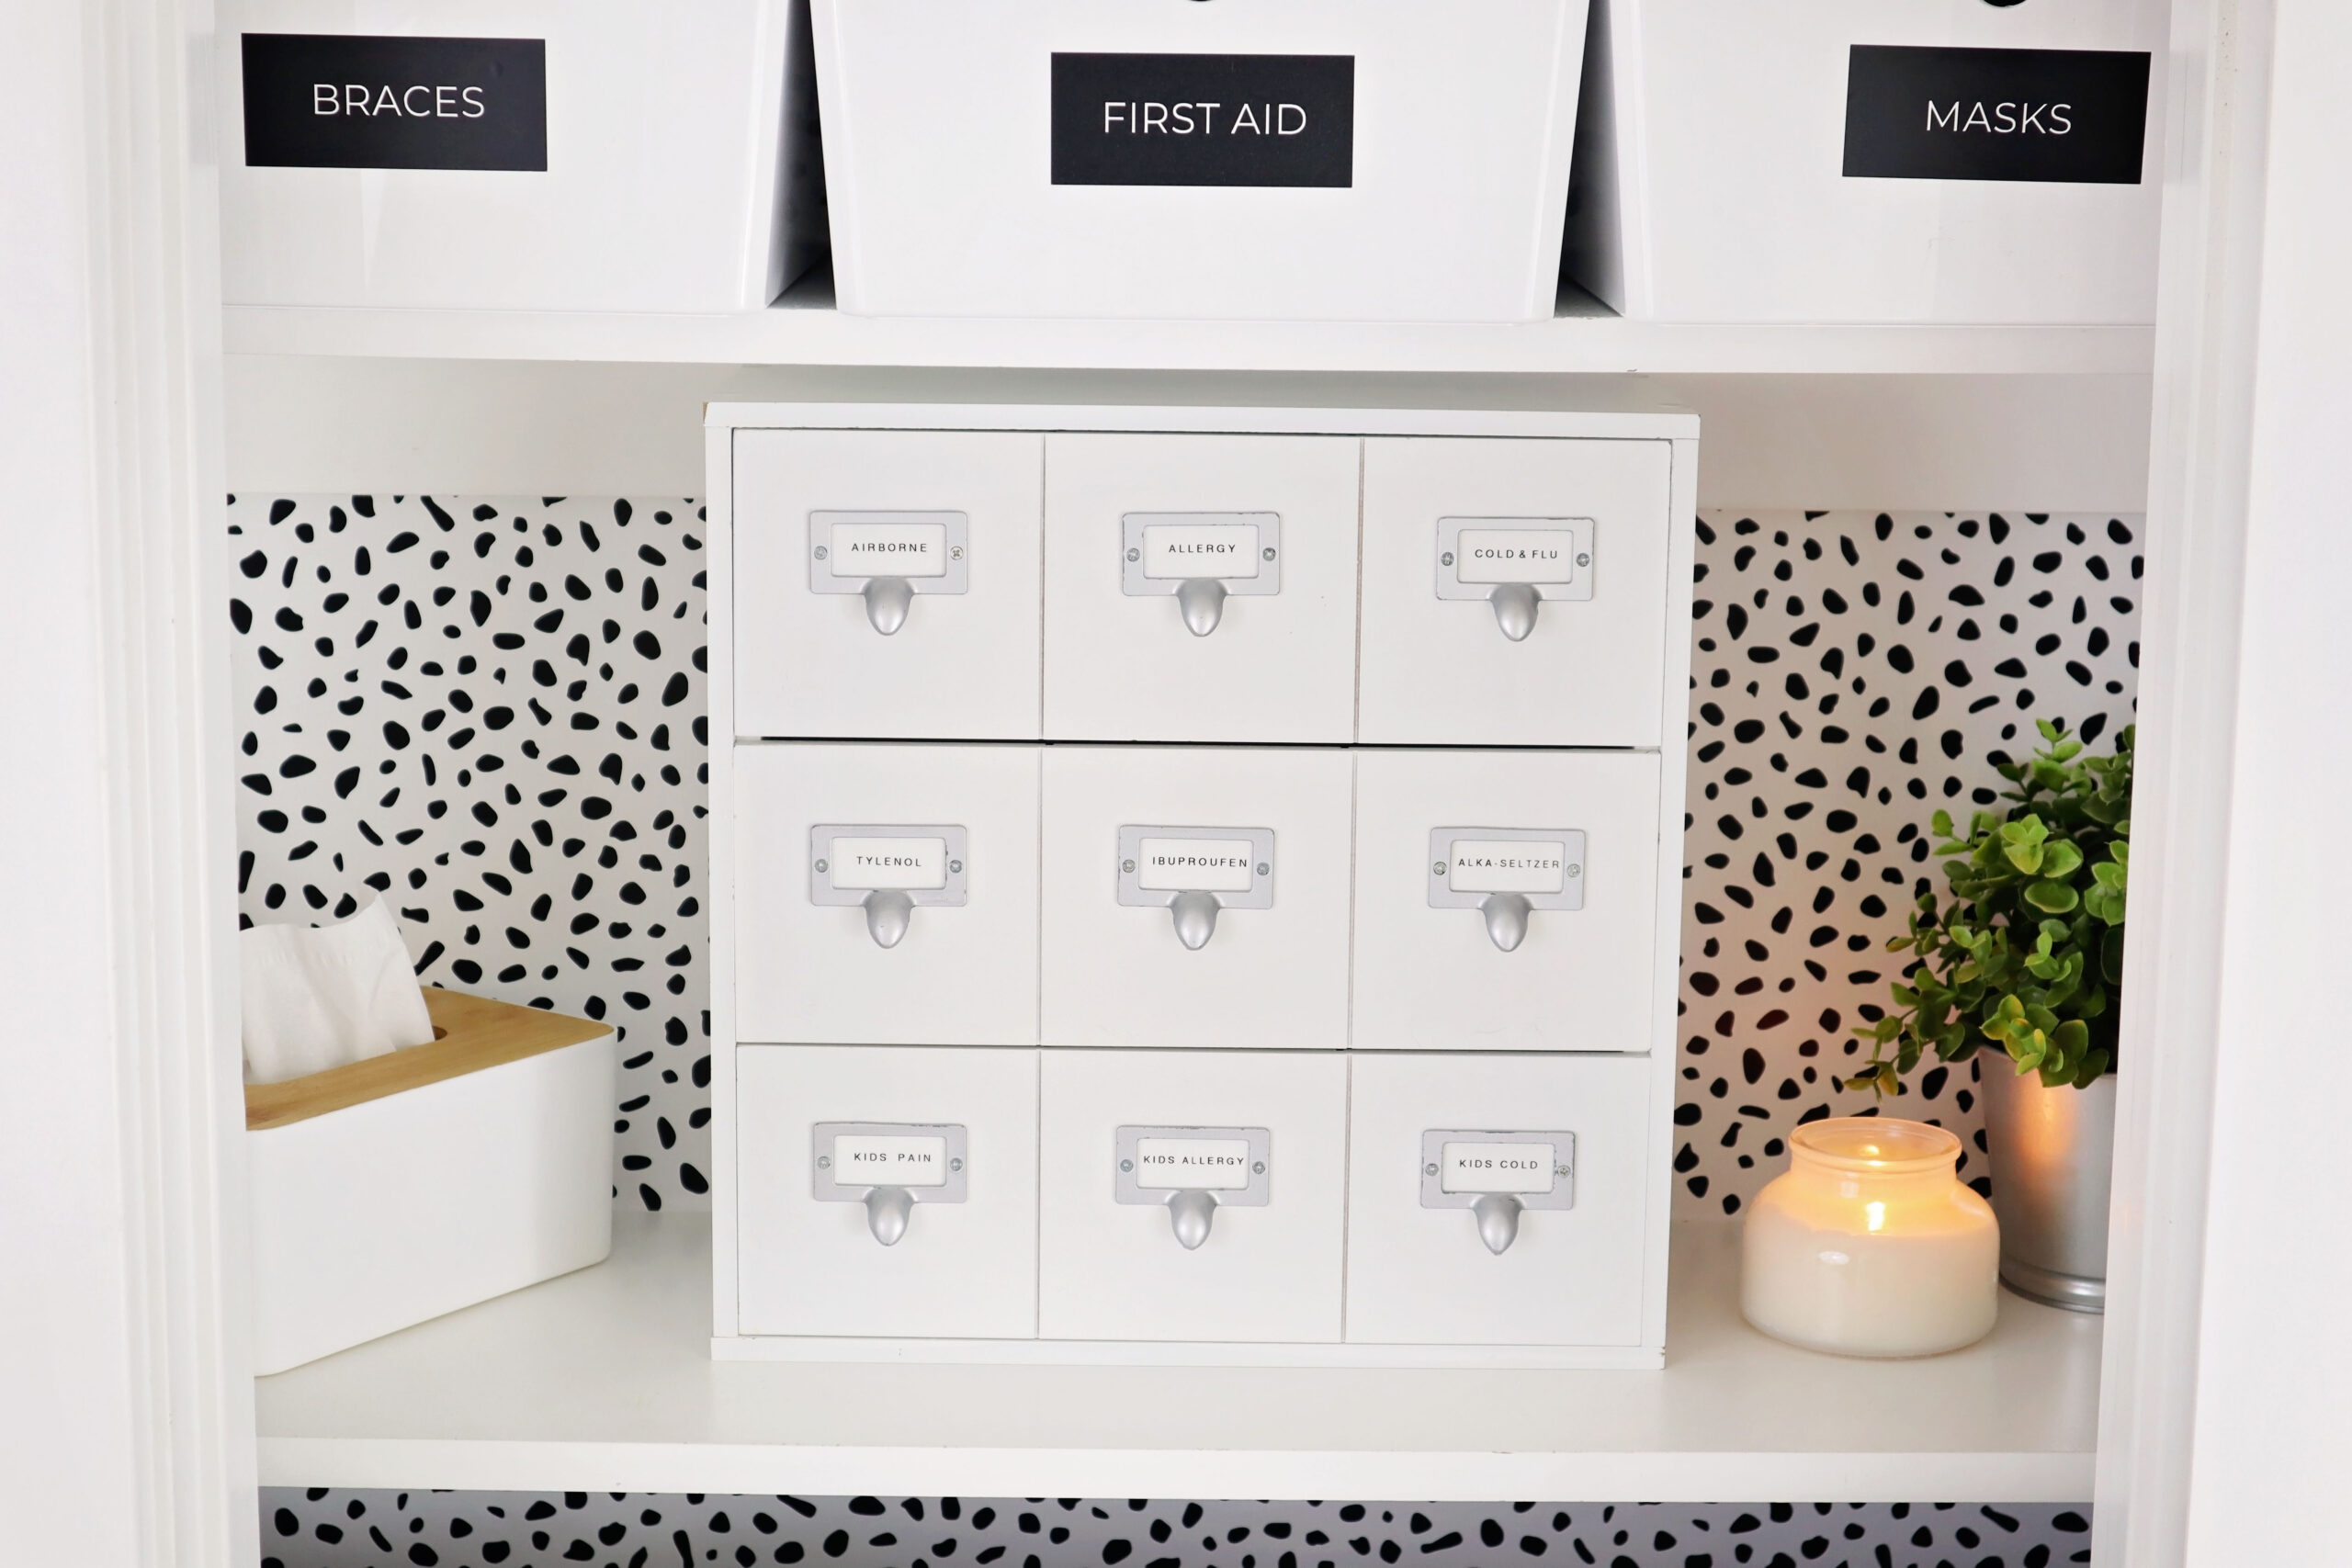
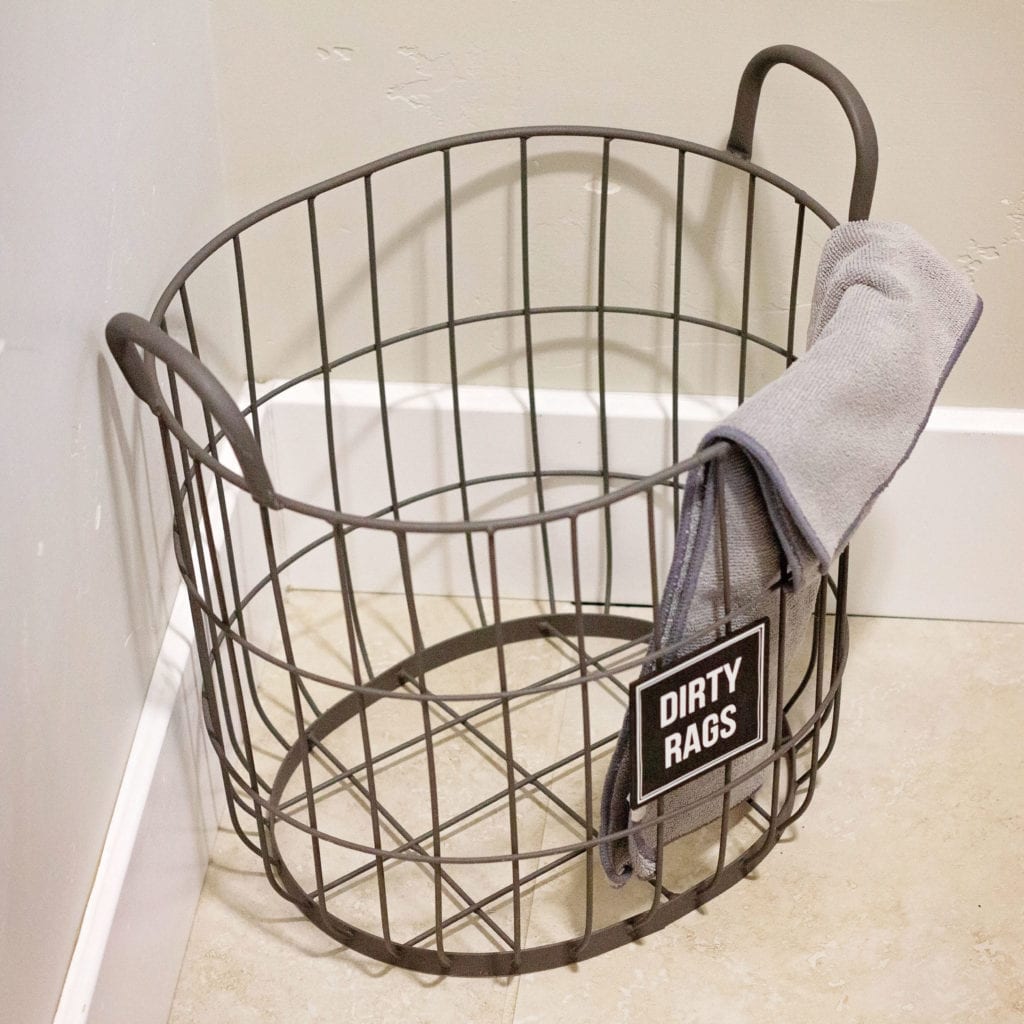
I weeded out the letters to let the white plastic showing through where the letters are.
(This is not a sponsored post written to get you to buy from the Cricut brand, I really just love my Cricut and genuinely think they make amazing labels!)
Label Your Home with Cricut Machines
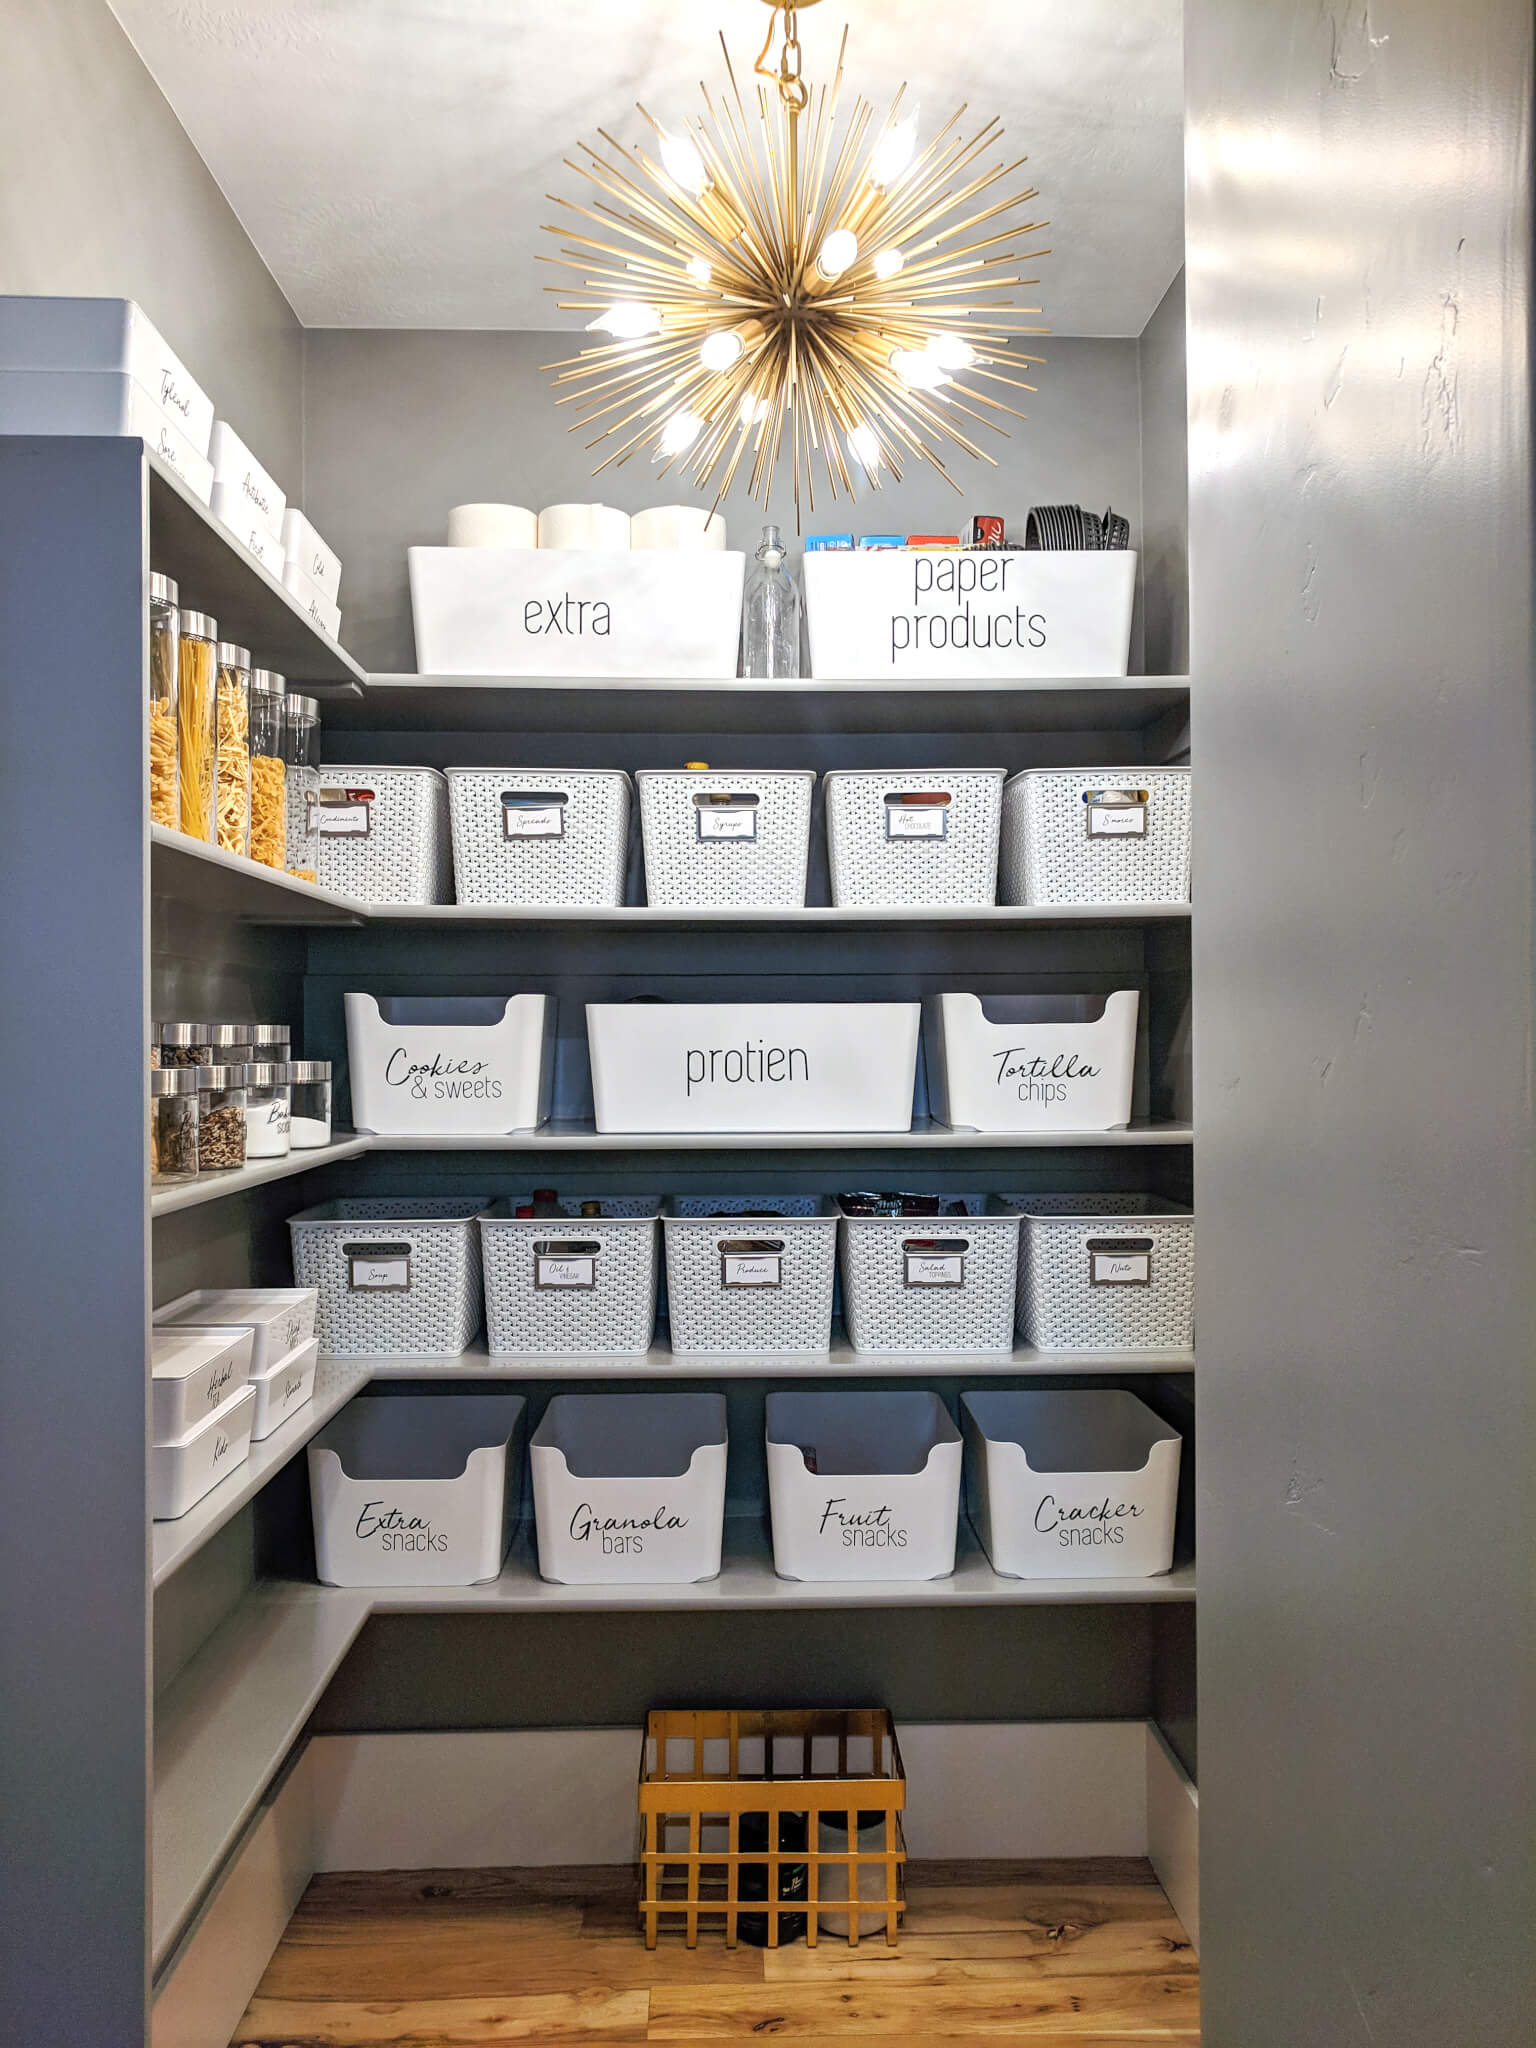
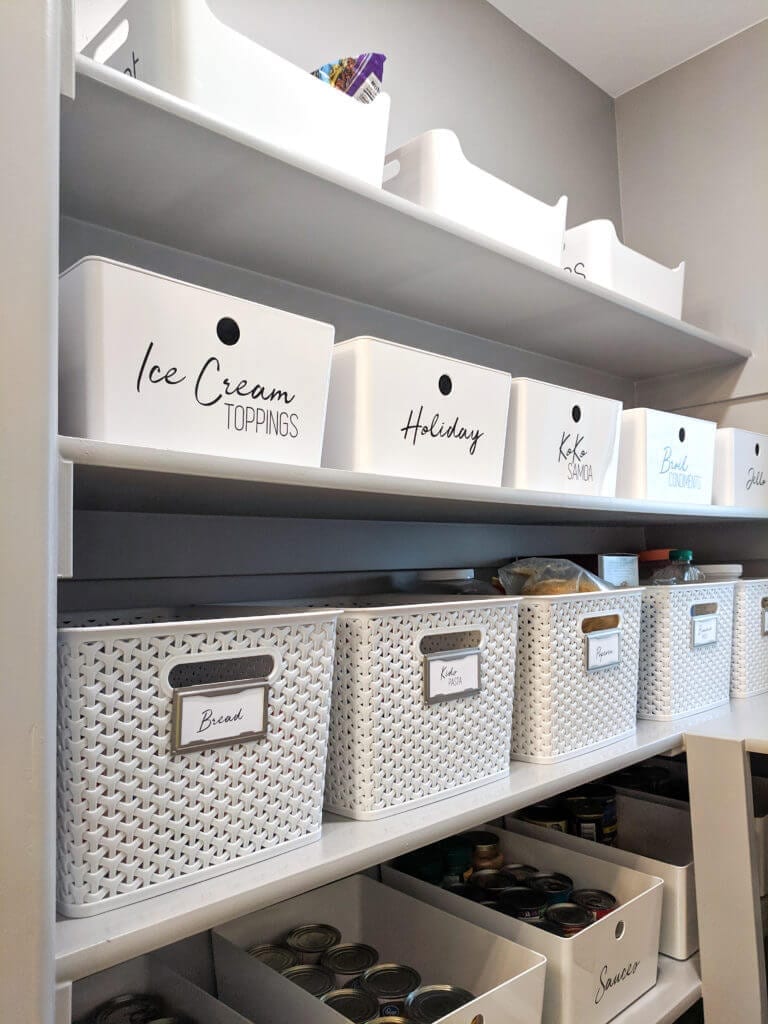
Labeling your home is a great way to keep your home organized because you can quickly identify where everything goes. It especially helps the whole family remember where things go. They’ll be able to just read those pantry labels instead of having to search through all the things!
There are lots of ways to label projects and rooms throughout the entire house, like with a label maker, handwritten labels, free printables, and other DIY labels. But one of my favorite ways to make labels for home organizing is with a Cricut.
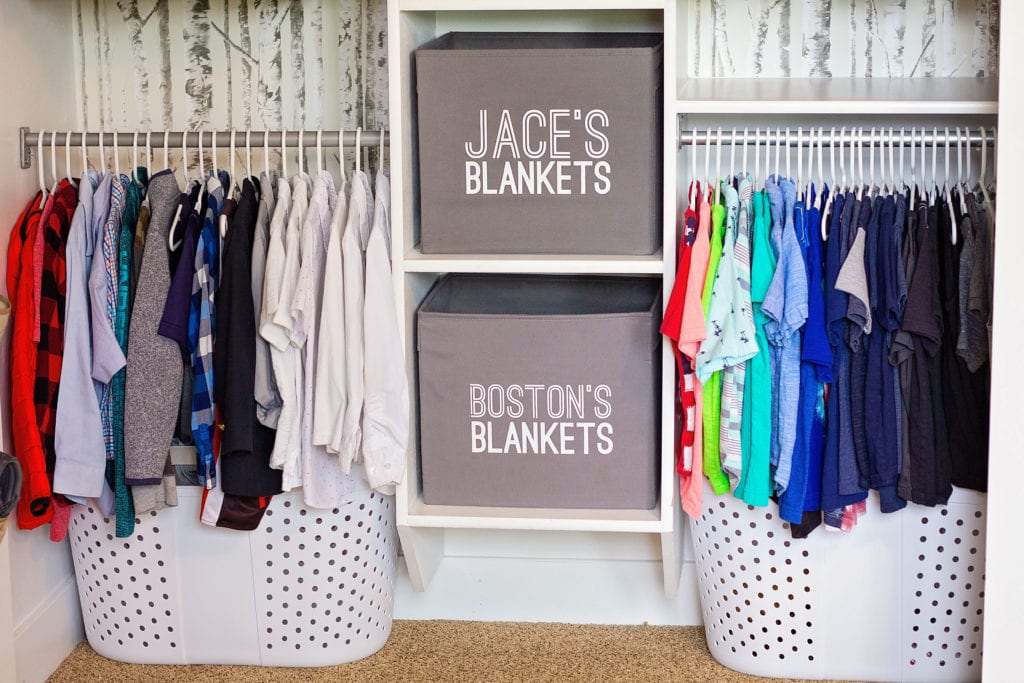
It still helps keep my boy’s shared closet organized!
TOOLS YOU’LL NEED

Why Cricuts Make Wonderful Labels
A Cricut is a label maker, but it’s nicer than most of the other label makers you can get.
Cricut machines are perfect for making labels because you can customize them to say anything you want. There are tons of options for fonts with Cricut Design Space. You can also upload your own fonts into Cricut Design Space.
For an extra cost, you can also pay for Cricut Access, which gives you access to lots of other fun fonts and images. It’s not necessary, but if you think you’ll be using it a lot and want that access to other images and options, it might be worth the cost.
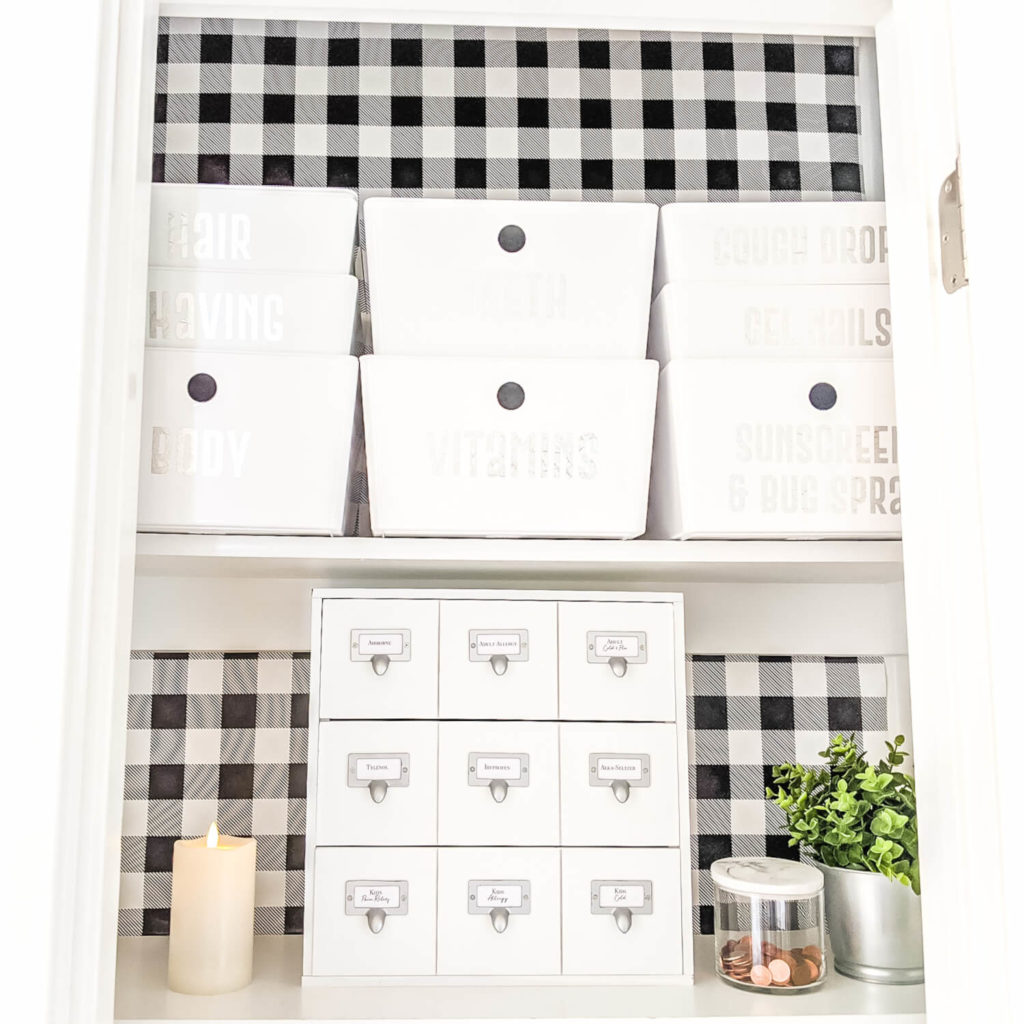
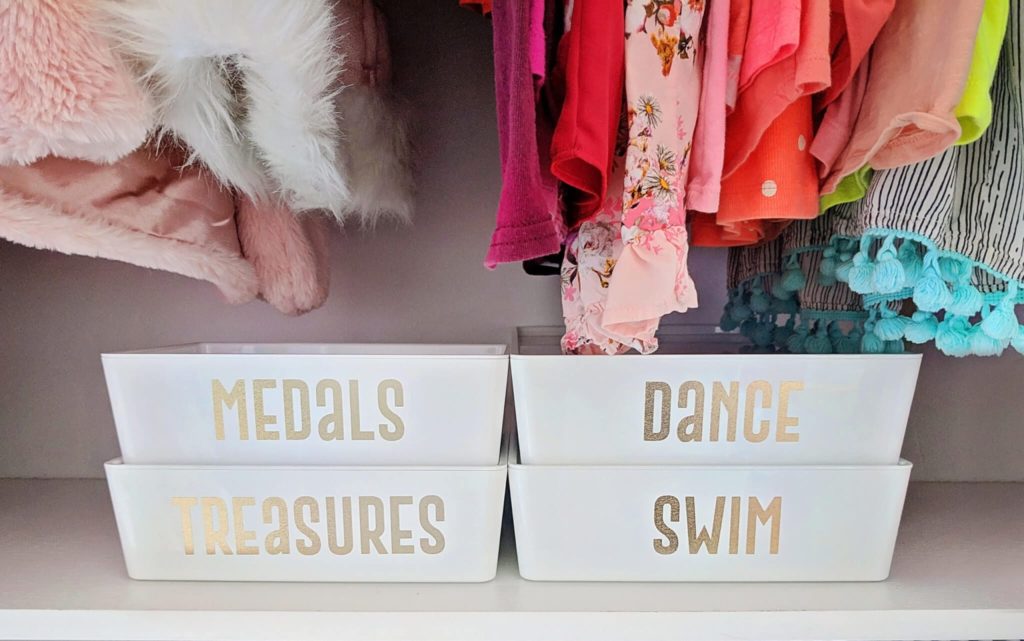
I have changed styles since but these letters were really fun to have in the past and I liked them.
In addition to fonts, you also have the option to use different colors to make your labels look great.
You can also use your Cricut to make an iron-on for a tee-shirt, reuseable stencils, cake toppers, a personalized door mat, and more. Plus a few more projects like making vinyl labels for glass pantry jars and a wooden sign.
TOOLS YOU’LL NEED
What Cricut Should You Get
If you don’t own a Cricut yet, you’ll probably find out quickly that there are lots of different options for a Cricut machine. So if you’re interested in making pantry labels, which Cricut should you get?
A Cricut Joy machine? A Cricut Explore? Well, it all depends on what you want to make. If you’re just looking to make labels for your pantry jars, then the Cricut Joy is a great option because it’s small and compact. It can cut vinyl and cardstock, which is perfect for making labels.
Because the Cricut Joy machine is more compact, it’s great if you have a small, dedicated space for crafting or you’ll need to store it away after each use.
On the other hand, if you’re interested in making more complex designs then the Cricut Explore is a great option. It can cut more materials than the Cricut Joy, like fabric and leather.
It’s also great for making labels because it has a built-in scanner so you can easily import designs from your computer. Plus, it comes with a wider range of fonts and shapes to choose from.
Both the Cricut Joy and the Cricut Explore are great options to help you create and make labels, it just depends on if you’re going to use your machine for different textures and other projects besides making labels.
TOOLS YOU’LL NEED
How to Use a Cricut To Make a Label
When you’re using a Cricut machine to label your home, there are a few things to keep in mind. One thing to keep in mind is that you’ll need to purchase materials for your labels. You can find Cricuts and materials at most craft stores or online.
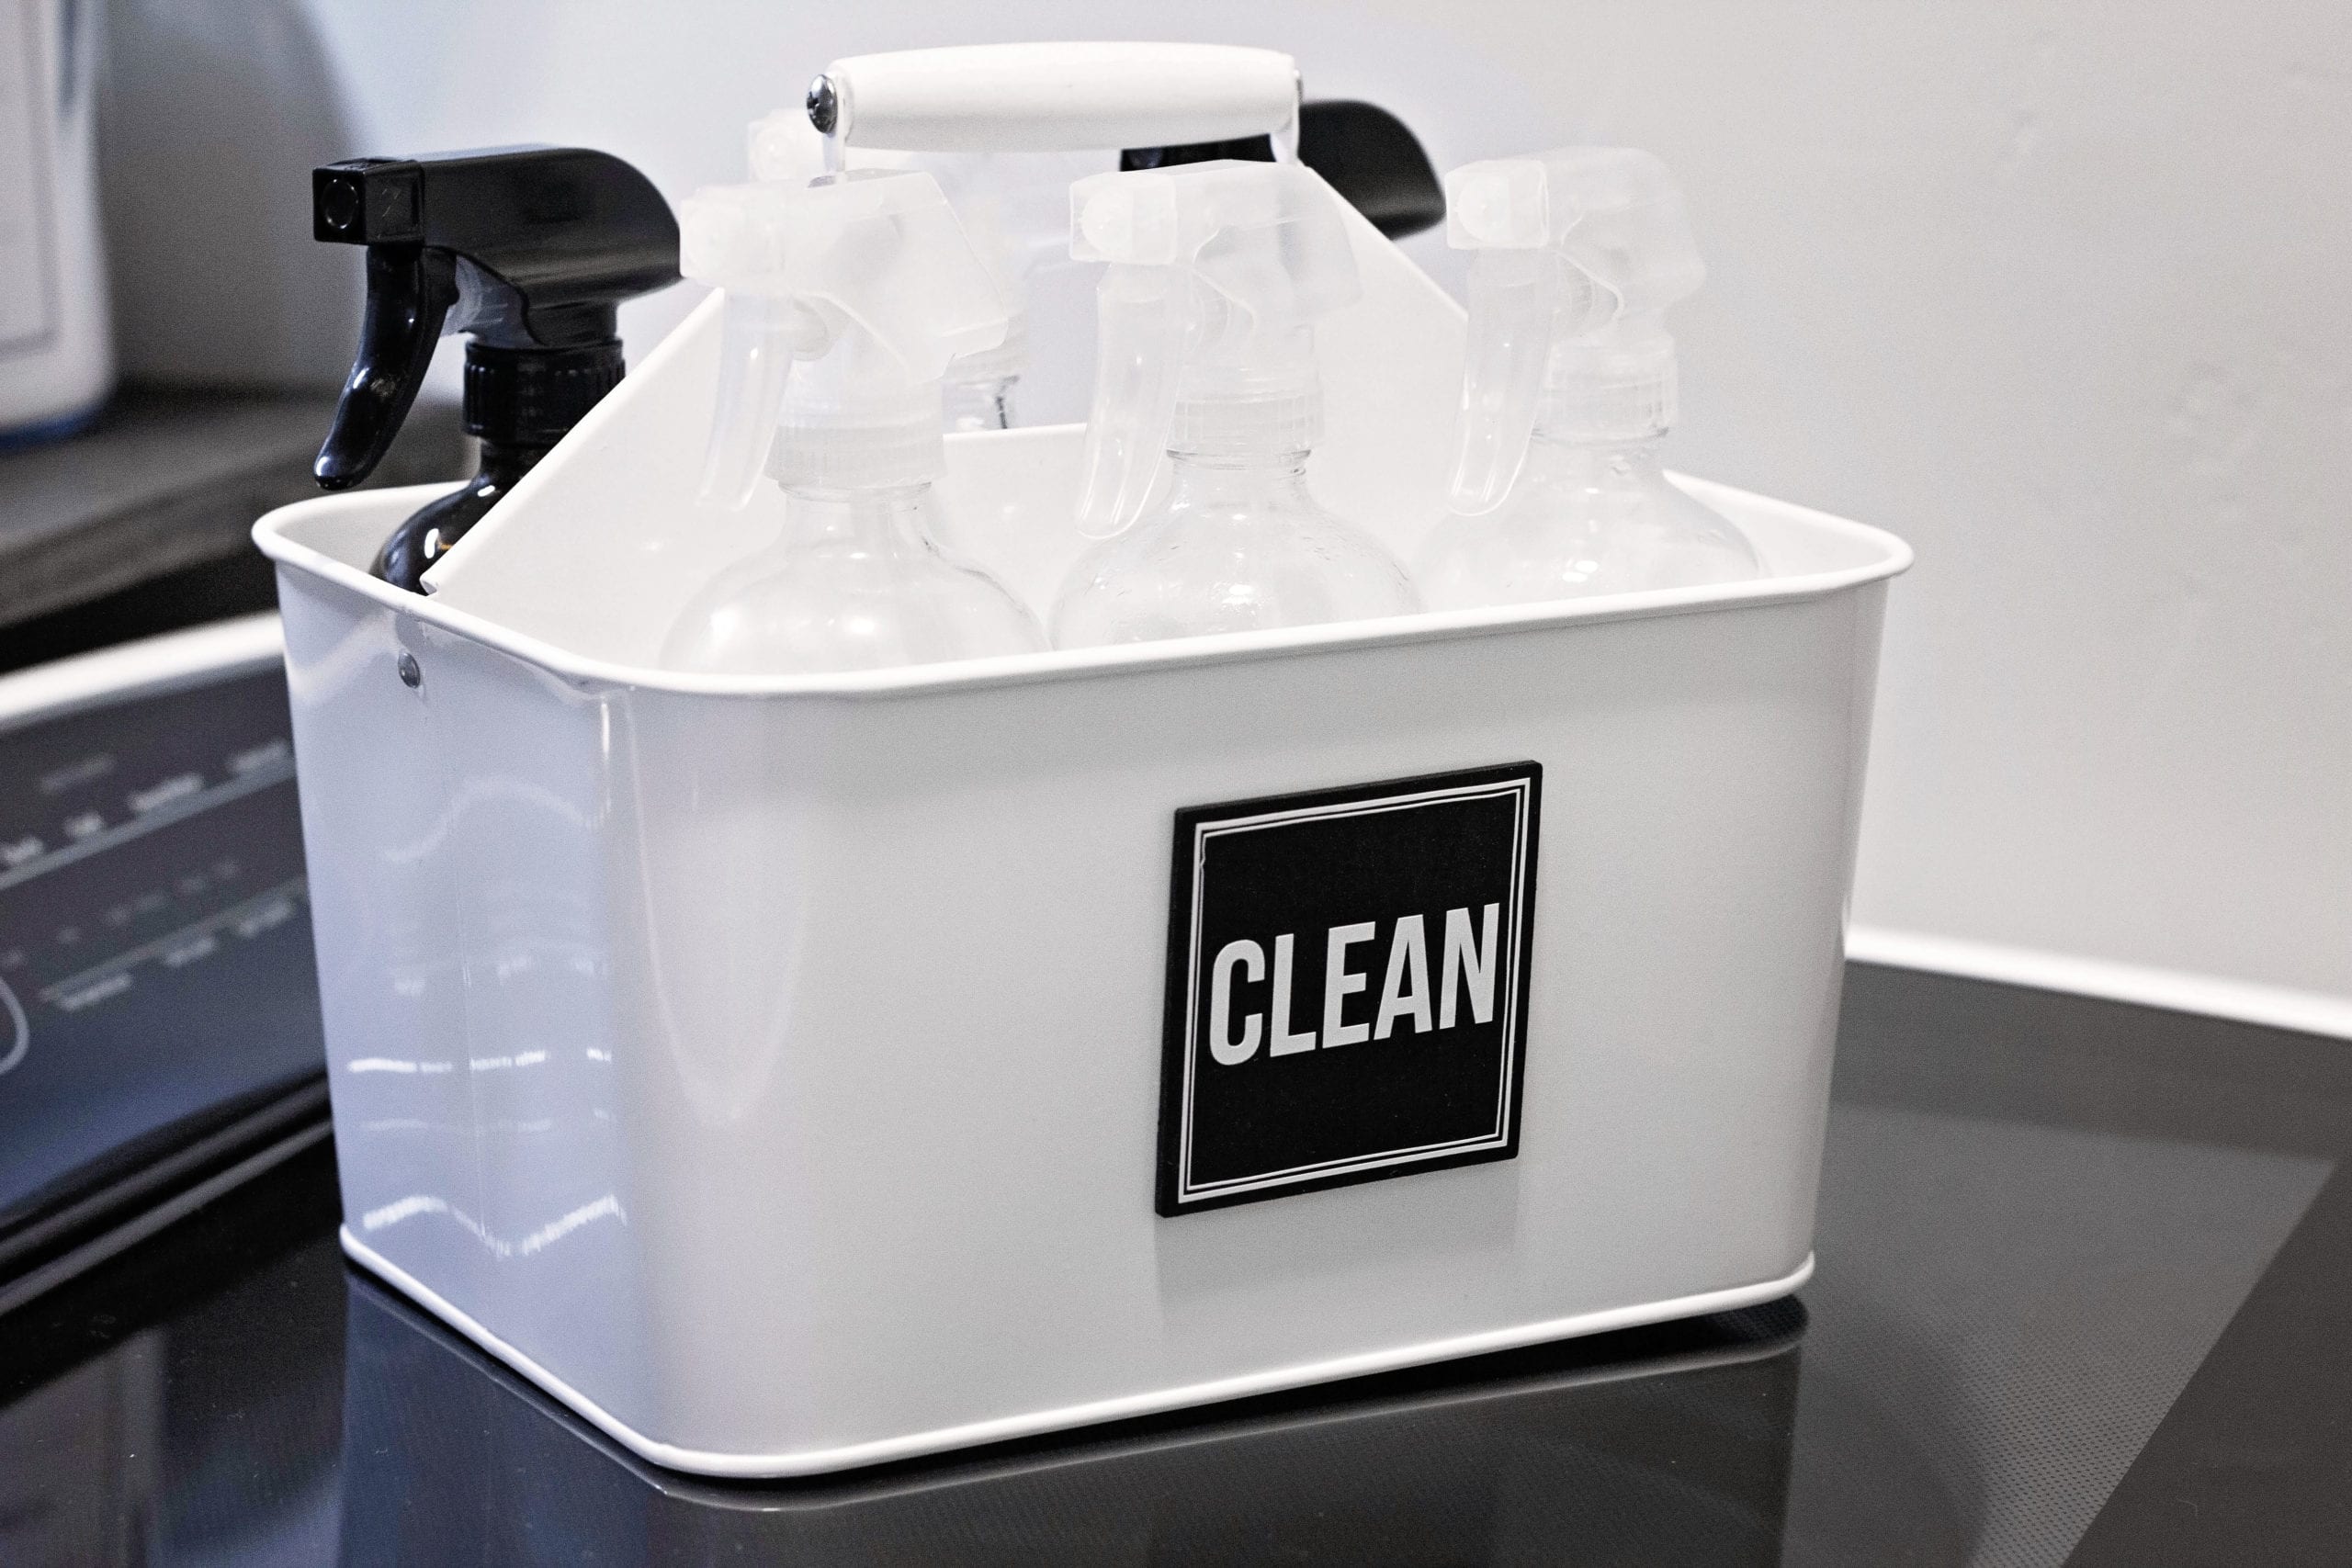
You can make different kinds of labels with your Cricut, but I like making vinyl labels. Vinyl labels are amazing for several different reasons. First of all, vinyl is resistant to moisture and humidity. Vinyl is also affordable and durable. While they aren’t permanent labels, they do have a long lifespan.
Vinyl also doesn’t leave a sticky residue like a lot of other labels. Plus, they easily stick to curved surfaces like jars, cups, and more.
To make labels, you’ll need:
- A Cricut Joy or Cricut Explore
- Vinyl (or the type of material you’re using)
- A cutting mat
- A scraper tool
- A weeding tool
- Material trimmer
- Transfer tape
Making Vinyl Labels with Cricut: Step-by-Step Process
Once you have your Cricut machine and materials, you’ll need to choose a design for your labels.
Use Cricut Design Space to Design Labels
You can either create your own design or use one of the many designs that are available in Cricut Design Space.
Your labels are basically like a blank canvas, so use Design Space to create labels that are exactly what you need for your home. Pick the font, text, or image you’d like to add to your label.
You might want to pick one font to use throughout your home, or you can have each project be a bit different – using a different font for each space or having a font designed specifically for a certain project like drawer organizers or containers in your refrigerator.
When you’re done designing, it’s time to cut the vinyl labels.
Cutting Vinyl with a Cricut Machine
Place your vinyl on the cutting mat and load it into your Cricut machine. Make sure that the blade is inserted correctly and that the vinyl is loaded in the direction.
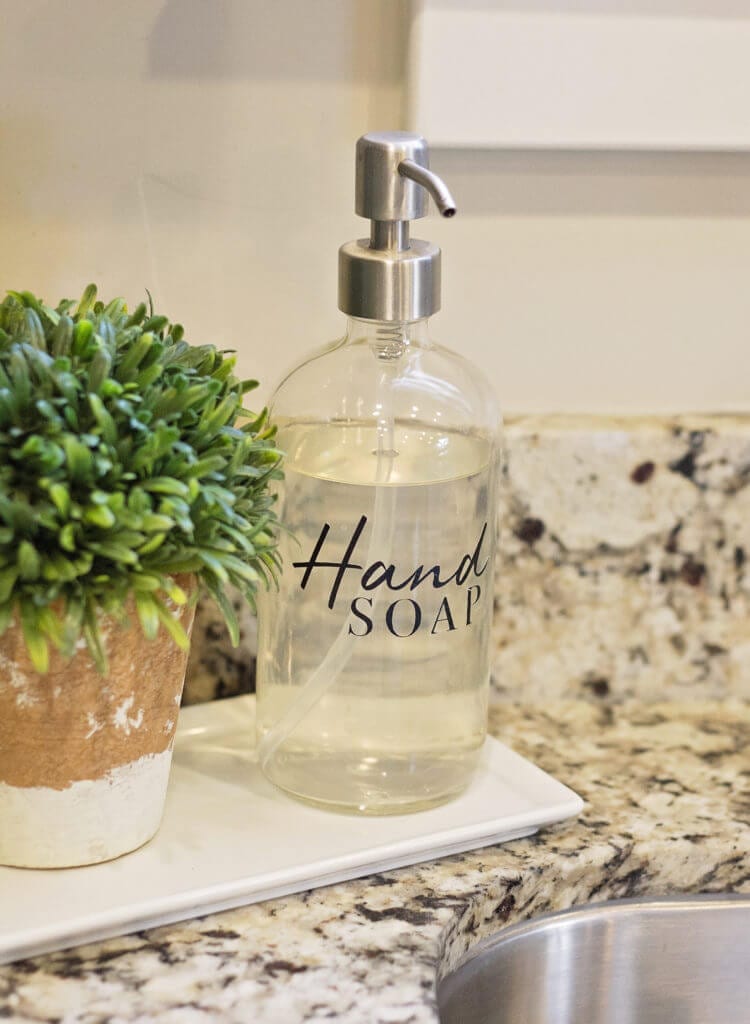
I like using white vinyl because I think white vinyl looks pretty in any space and on any project, but it can be fun to use different colored vinyl as well!

Then push “Make It” and follow the prompts in your software to being the cutting process.
Weed Your Label
Once your new project is all cut, the next step in the process is to “weed” it. Basically, that just means unloading your vinyl label and removing the excess vinyl from around your label.
You’ll want to make sure to trim or cut/weed anything from the vinyl label you don’t want in your finished label.
Apply Transfer Tape
After weeding the excess vinyl from your vinyl labels, it’s time to apply the transfer tape. To do this, cut a piece of transfer tape slightly larger than your label.
Use the grid line on your tape to make sure your vinyl labels are lined up properly!
Then, remove the backing from the transfer tape and place it over top of the vinyl label. Rub it down well with a scraping tool so that it’s securely attached to the vinyl.
Stick Your Vinyl Label to Your Project!
Now that you have your labels all cut out and weeded, it’s time to apply them to whatever sign, project, drawer organizers, shelves, jars, containers, or space you want to be labeled!
To apply your label to your projects, carefully place your label where you want it on your project, then use a scraper tool to rub over the entire label so that it’s affixed well.
Then slowly peel away the backing paper from your vinyl label.
Finally, slowly and carefully peel the transfer tape off so that your vinyl labels stay in place! If any parts of your design start to peel up, use your scraper tool to stick those labels down firmly.
And the Process is Complete
And now you’re all set! You’ve just used a Cricut to create fun labels for your home. Making labels with Cricut is easy and will make the labels in your home look so put together and nice.
Other Labels You Can Make with Cricut
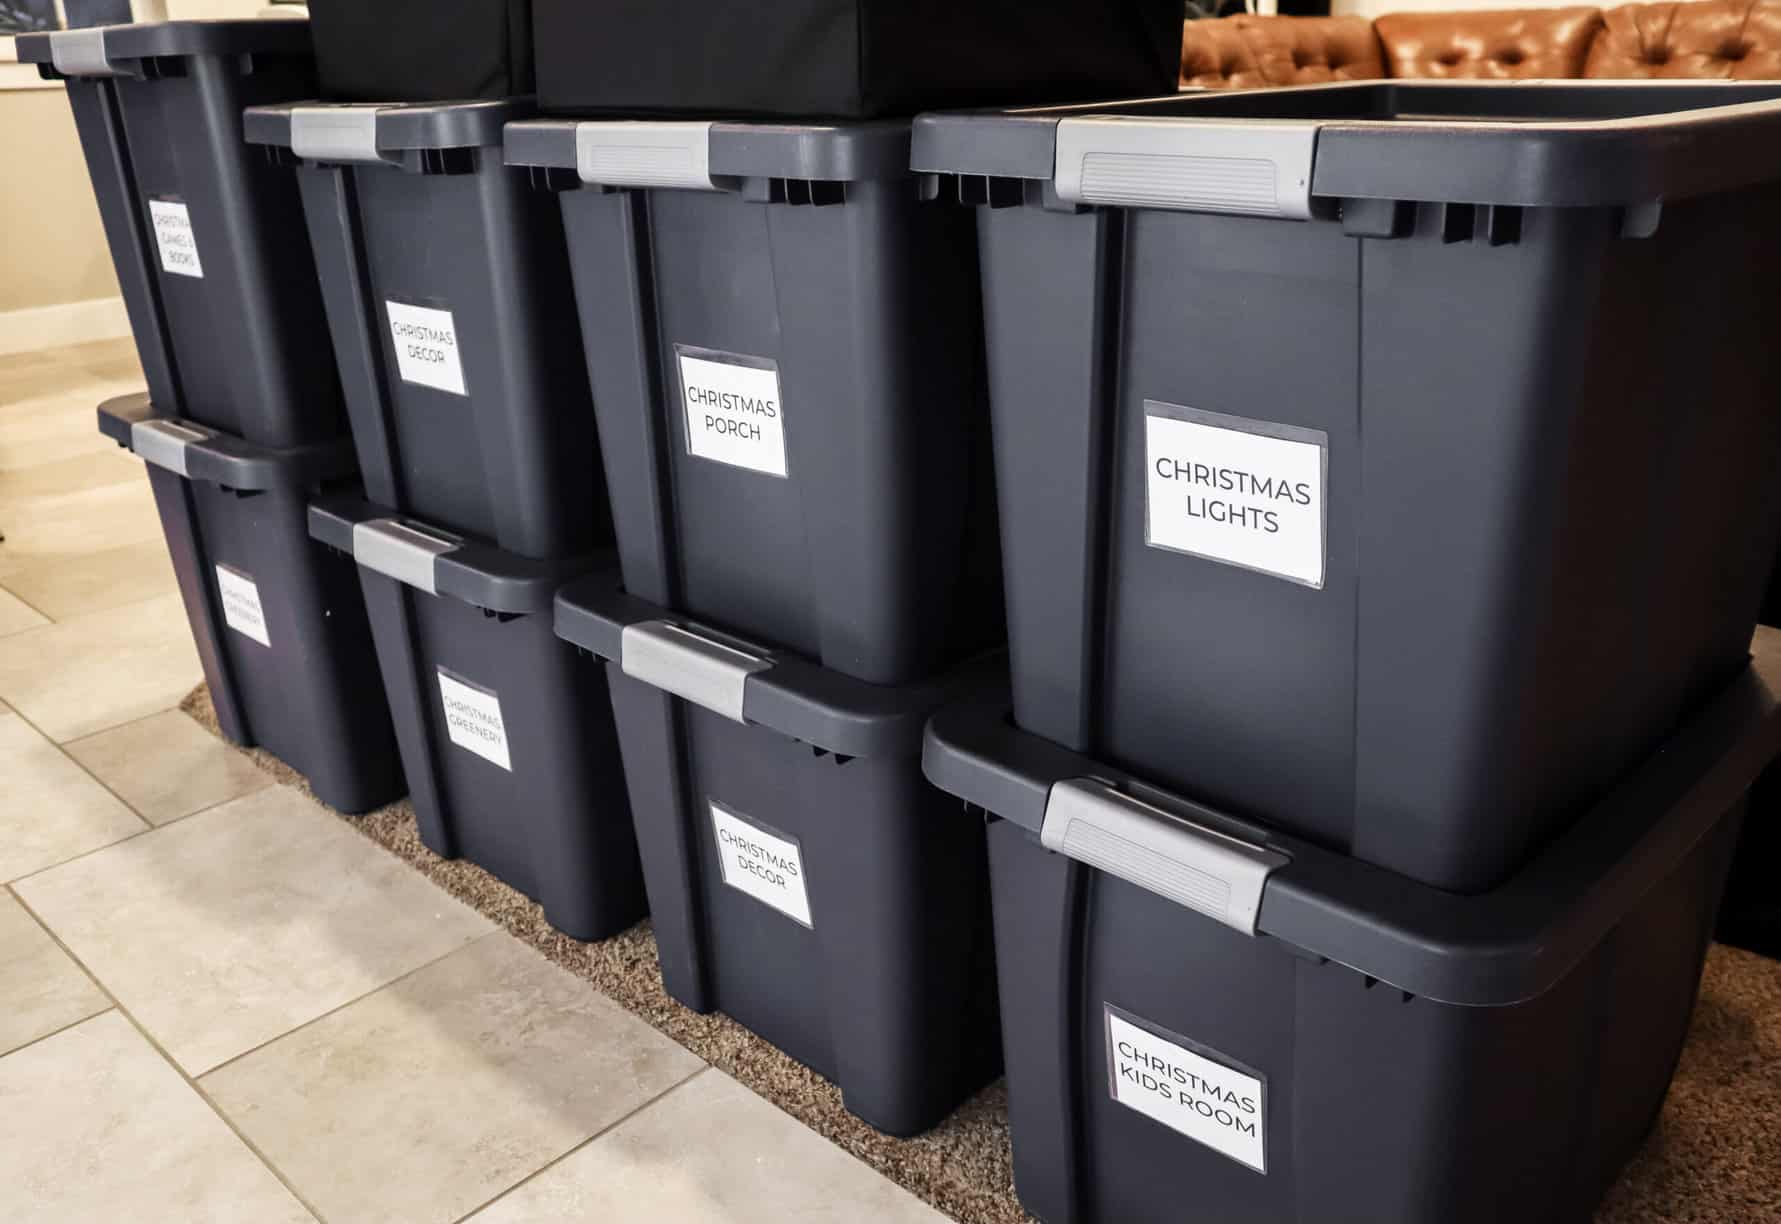
Besides vinyl labels, you can make other labels with Cricut, like paper labels. Making paper labels with Cricut is also a great way to label your home.
If you have a lot of bins and you don’t want to make vinyl labels that stick straight to them, you can make paper labels with your label maker and then laminate them to make labels more durable.
Then you can tape them to your bins or add velcro to the back of the labels and to your bin and you have made labels with Cricut that are easy to change out whenever you’d like.
Using a Cricut label maker, you can also make fabric labels. Fabric labels are great for labeling clothing, towels, and bedding.
You can also make iron-on labels with Cricuts. These are great for labeling clothes that can’t have anything sewn into them.
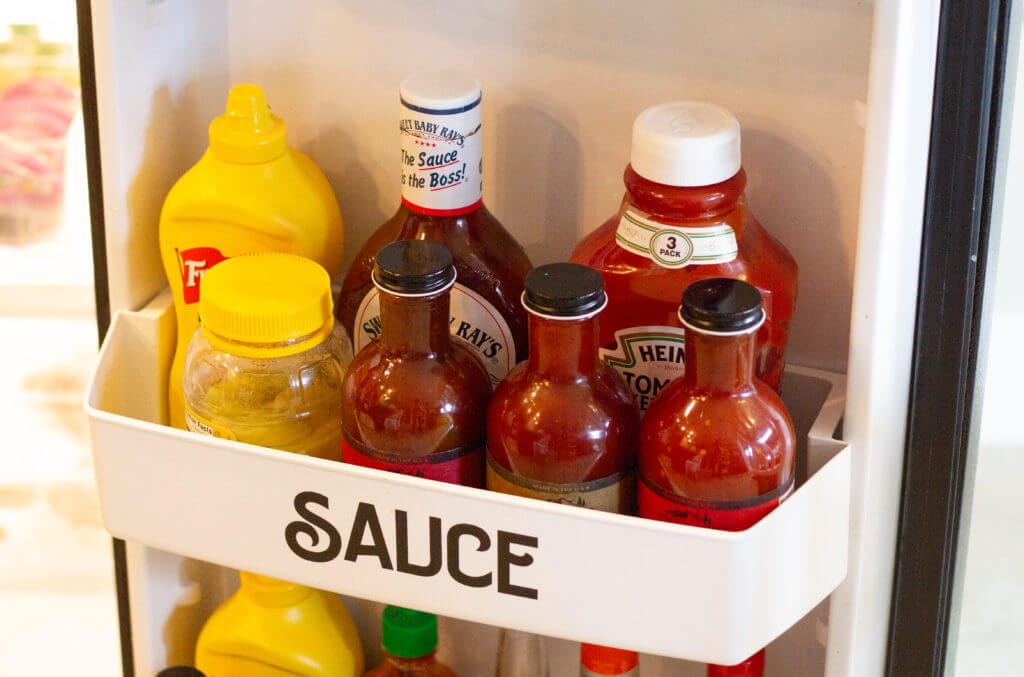
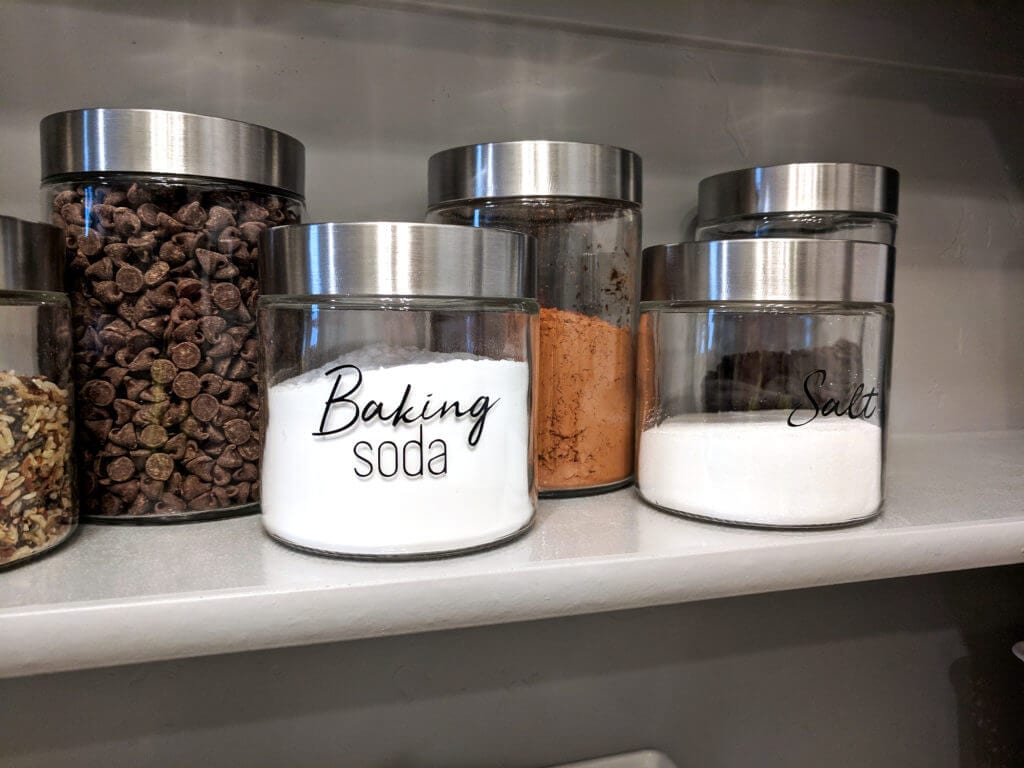
Cricuts are also great for making food labels. You can make labels for your pantry, fridge, and freezer.
You can even make labels for your spices! Making labels with a Cricut is a great way to organize your home and add a personal touch to your space.
Once you’ve labeled all your projects, containers, and organizers, you’ll find out how easy it is to organize your home.
Using a Cricut Machine for Home Organizing
As you can tell, I’m a big Cricut maker fan. I love making labels with Cricut. It just makes home organizing so much easier!
Reading through the different options for a Cricut and how to make a label with a Cricut might sound stressful, but once you get past the first project, you’ll become a pro!

Labeling your home will become easy and fun once you get started with your Cricut machine and begin to create your labels. Trust me, you’ll be so glad you took the time to label your home using a Cricut! You’ll go wild making pantry labels and choosing the perfect font for each space in your home.
Before you know it, you’ll find joy in being able to create and make labels with Cricut.
Do you have any questions about using a Cricut for home organization? Leave them in the comments below and I’ll be happy to answer them!