11 Easy Steps to Create Beautiful Faux Leather Keychains
Have you always wondered how people make DIY faux leather keychains? This up-and-coming trend is gaining popularity and thankfully for all of us, it’s really easy to do! Here are 11 easy steps for creating your own faux leather keychains that you’re sure to love!
Need more ideas? Check these this post where I coordinate my Keychains for my car! 10 Ways to Personalize Your Car Without Looking Tacky
The really funny thing about me writing this post is that my husband hates me to have keychains on my keyring! When we go somewhere or if we travel, my husband is the one that carries the keys and he hates how much they bulk up his pockets. He thinks they’re so annoying! 😂
But I think they are so cute! The possibilities are endless with creating these keychains. It’s up to you how big or how small the keychains are depending on your husband’s tolerance for big keychains.
Supply List
- Faux Leather (This is a good starter kit, these are cute metallic colors, and if you want bigger sheets this is a great store with fast shipping!
- Iron-on Vinyl, Pretty metallic Iron-On or Regular Vinyl
- Rivet Kit
- Keychain Rings
- Hot Glue Gun
- Hot Glue
- Silhouette or Cricut Cutting Machine

Designing Your Keychains
The first step to creating faux vinyl keychains is to decide what you will be using your keychains for. Make a list of all of the keychains that you want to create. This will help you in the design process and it will also help you to conserve the faux leather.
Here are a few keychain ideas to help keep you organized:
- House
- Car
- Church
- Family cabin
- Work
- Storage Unit
- Boat/ Watercraft
- ATV
- Event Center
- Holidays
- Monogram Keychains
After you have a list, the next step is to design your keychains on your cutting machine software! I have a template available for download of some basic shapes that you can cut out for keychains. Of course, you can choose to adjust the sizing to your taste. Or you can get creative and create your own!

Here is a link to the designs that I used (or purchased) for some of my keychains:
Cutting your Faux Leather Keychain
After you have designed your templates, place your faux leather on your cutting mat. I experimented and tried putting the faux leather side up or soft side up. The cutting was definitely more successful if you put the leather side up.
Make sure to adjust your cutting blade to a deep setting. I adjusted my blade to a 10. But that may vary with the type of machine or blade that you have. I also made two or three passes depending on the vinyl sheet. So make sure to check that there was a clean-cut all the way through before you unload your cutting mat.
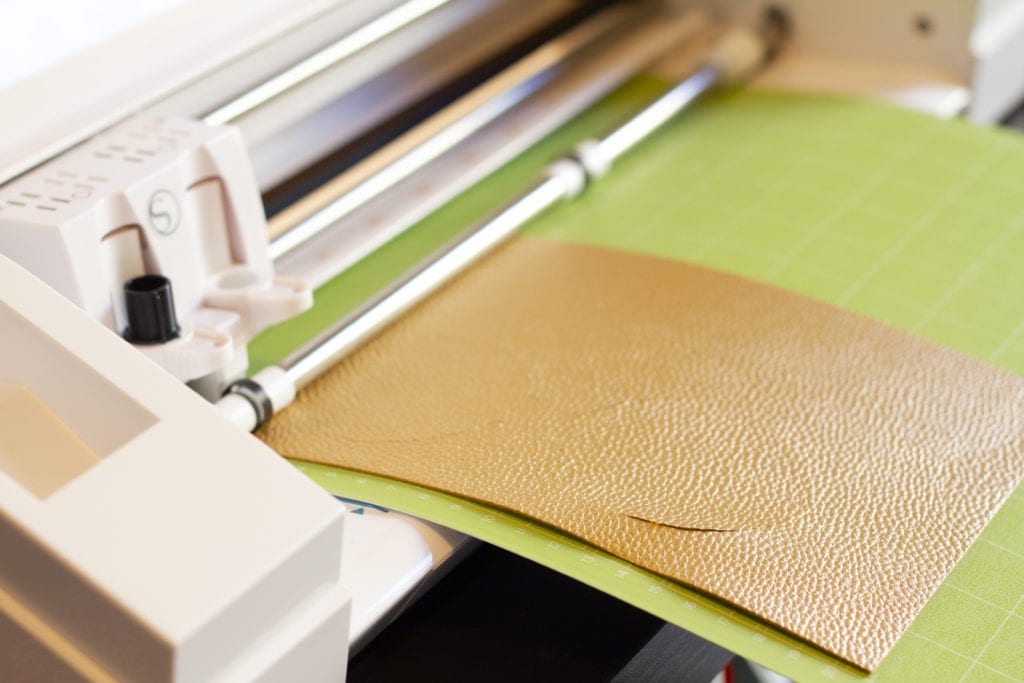
I made the mistake of unloading my cutting mat before I checked to see if it cut all the way through. It hadn’t, so I had to hand-cut the bottom half of the leather vinyl on a couple of my keychains because it didn’t cut all the way through.
Applying the Vinyl Design
After you cut your faux leather keychains, the next step is to cut your vinyl for the label, words, or the design that you chose.
This next step is a little bit about preference. You can choose to do regular vinyl or iron-on vinyl. For many of these keychains, I did iron-on vinyl until I had a mishap. The iron melted a couple of my faux leather keychains when I was trying to iron on the design to the leather. So I think this may be a bit of trial and error when it comes to seeing what types of faux leather can withstand the heat of the iron.
With the remaining keychains, I simply used regular vinyl and made sure to press it down firmly onto the leather. It would help to choose permanent vinyl instead of removable if you choose to not do iron-on vinyl.
The next step is to apply the vinyl to the keychain shape cutout. Make sure that the design is centered on the shape. Then iron it on or stick it on depending on the type of vinyl that you chose.
Assembling Your Faux Leather Keychain
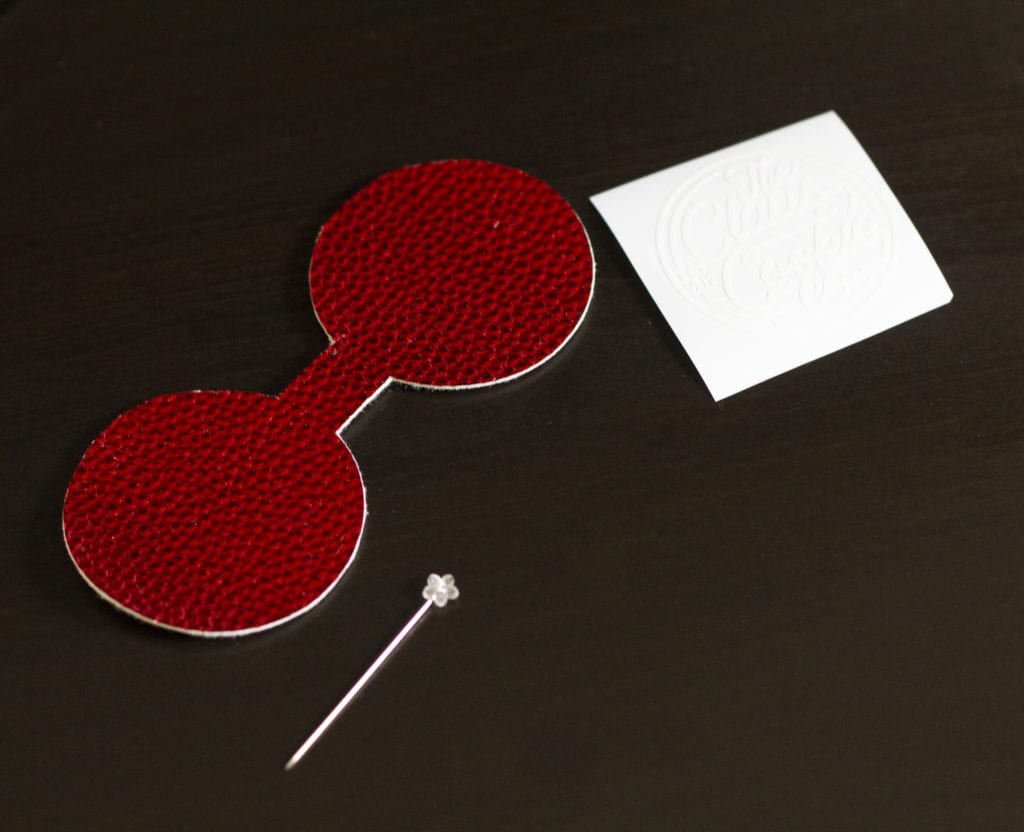
Now you can finally see your keychain coming together! After you have put on the vinyl, the next part is to loop the faux leather keychain shape through your D-Shape keychain. Next, fold the keychain in half so that the top half of your leather covers the bottom half exactly.
After you have looped your leather through the keychain, next you need to hammer a rivet right below the keychain. This part is optional but it really does make it look more like a finished keychain. If you purchase the Rivet Kit that I recommended, it comes with a picture tutorial on how to install them.
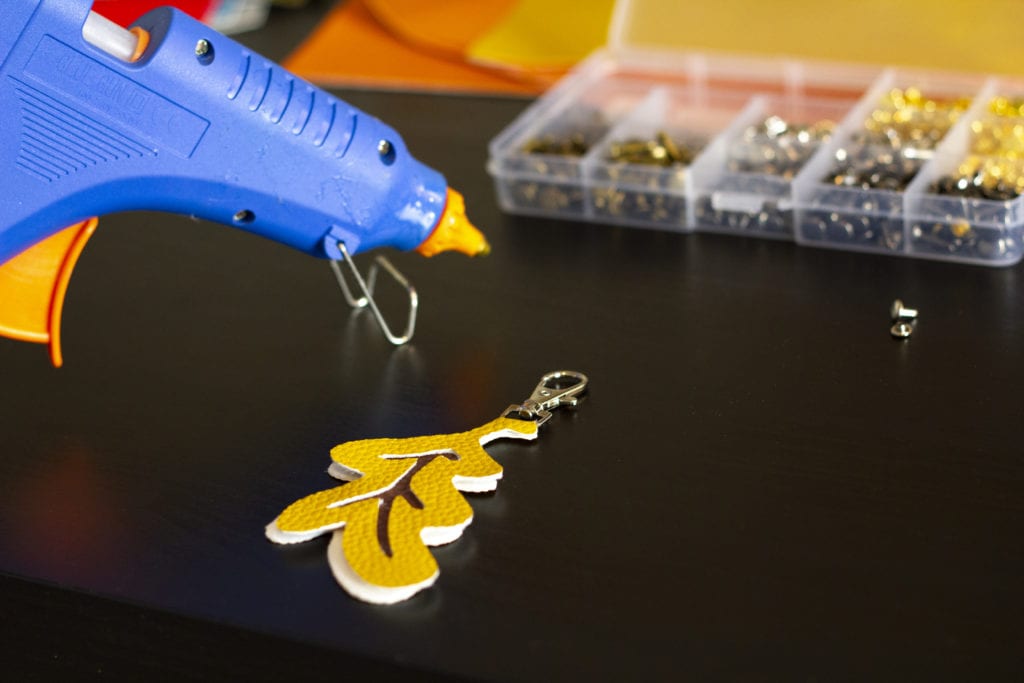
After you have placed and hammered your rivet in, all you have left to do is to glue the two layers together! I used a hot glue gun and made sure that I did a very thin layer of glue so that it didn’t make my key chain look bulky or bubbly.
The last step is to take a look at your keychain and make sure that all of the edges are matching up perfectly. If the backside of your keychain is not matching up with the front side perfectly and it sticks out a bit, just take your scissors and trim it up a bit.
A Few Faux Leather Tips
Be conscious about conserving space on your full leather sheet. Put a bunch of keychains on your design software and cut out several keychains at the same time. You can even get creative with how you lay it out so that you can fit as many keychains as possible on your full leather sheet.
Have a new sharp blade that is made for making deeper cuts. This will save you a lot of headache of having to tediously cut out extra shapes that didn’t cut all the way through.
Make sure to test out your vinyl in an inconspicuous area with a warm iron to see if your faux vinyl is able to withstand the heat of the iron. I made the mistake of assuming that all of my sheets would be able to withstand the heat and I ended up melting one of my orange sheets!
The sky’s the limit
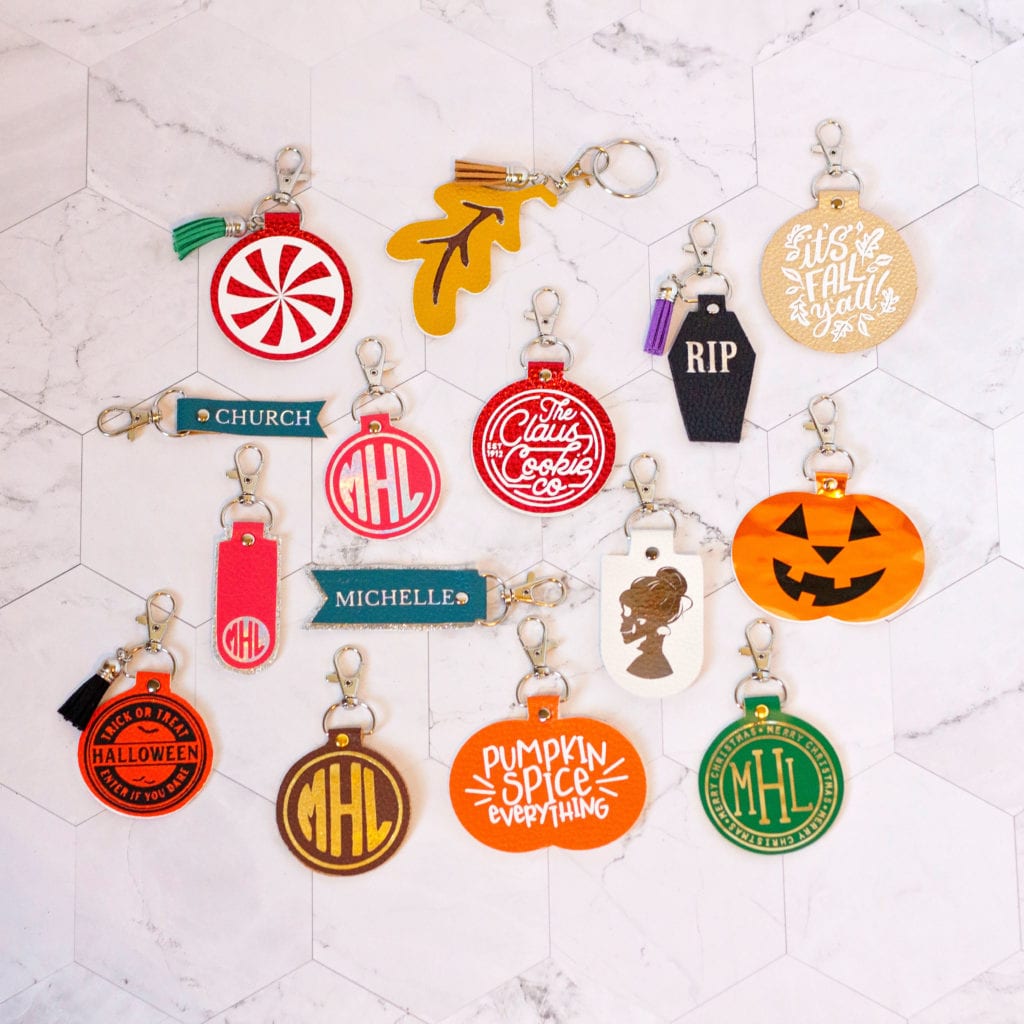
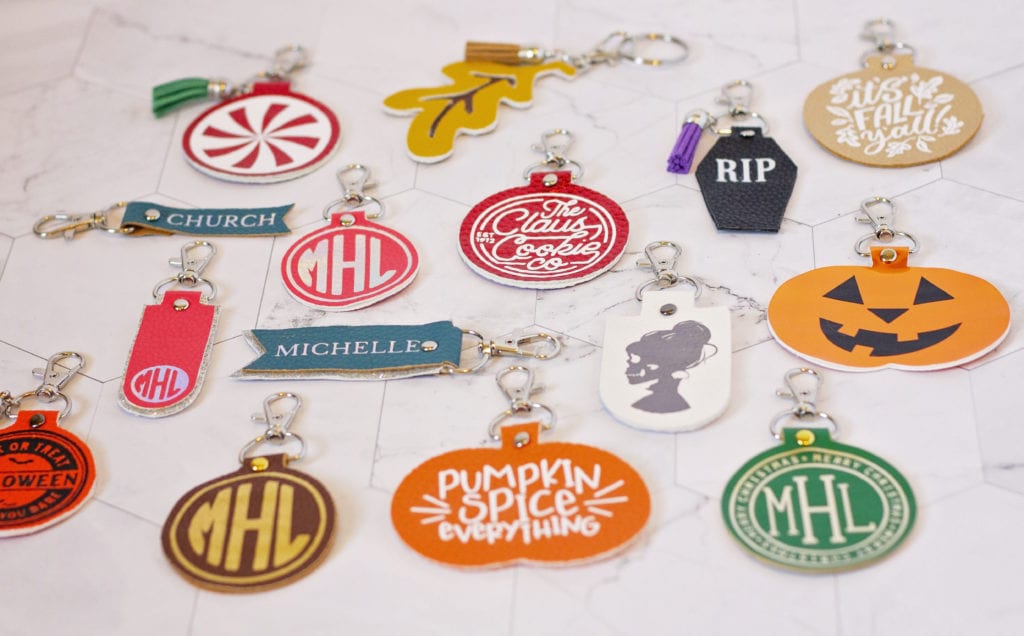
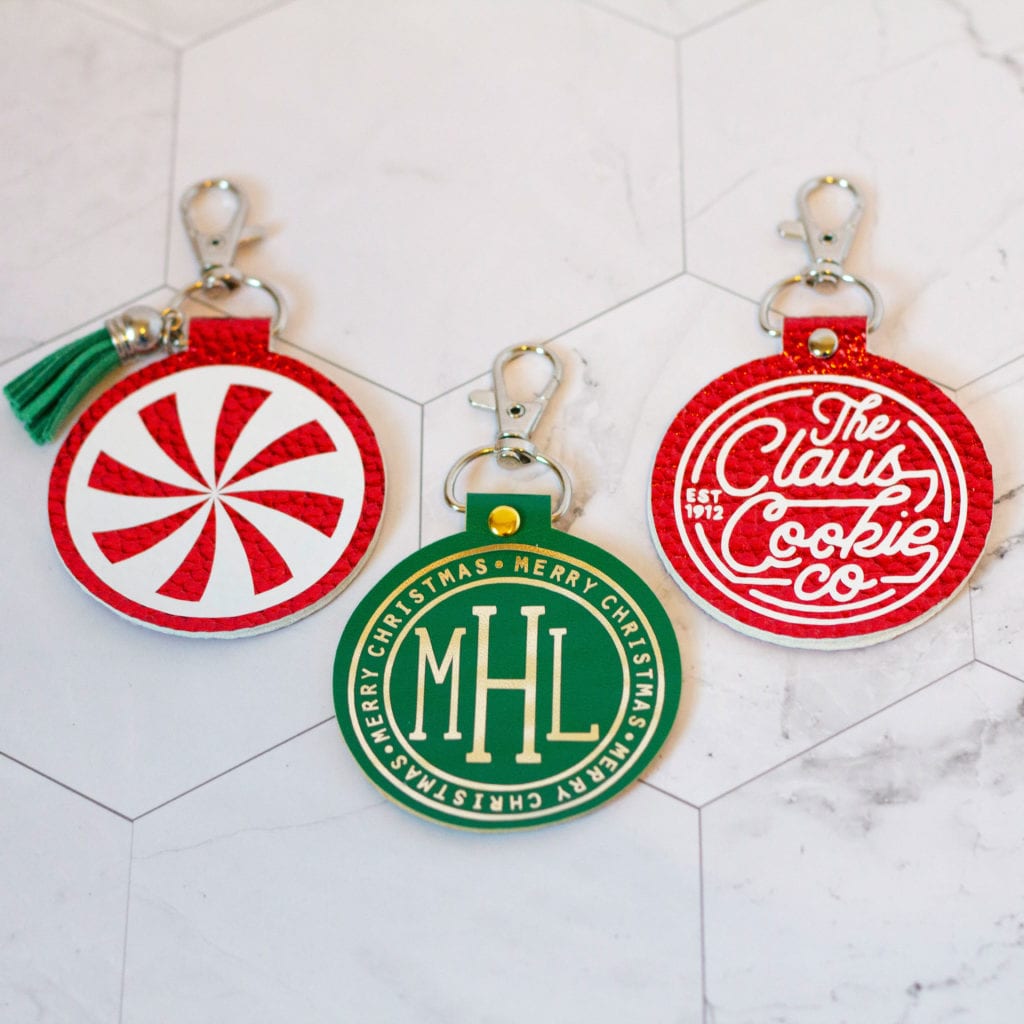
You can see that I had a lot of fun designing my keychains and I did a variety of monogram keychains label keychains or even holiday keychains!
I started decorating my car for holidays in small ways. So I wanted to bring that out in the keychains that I made. So I made several keychains for Fall, Halloween, and Christmas!
It’s a fun way to add some personality to your car and it brings a big smile to my face every time I see them! The best part is that I was able to design them to my liking.
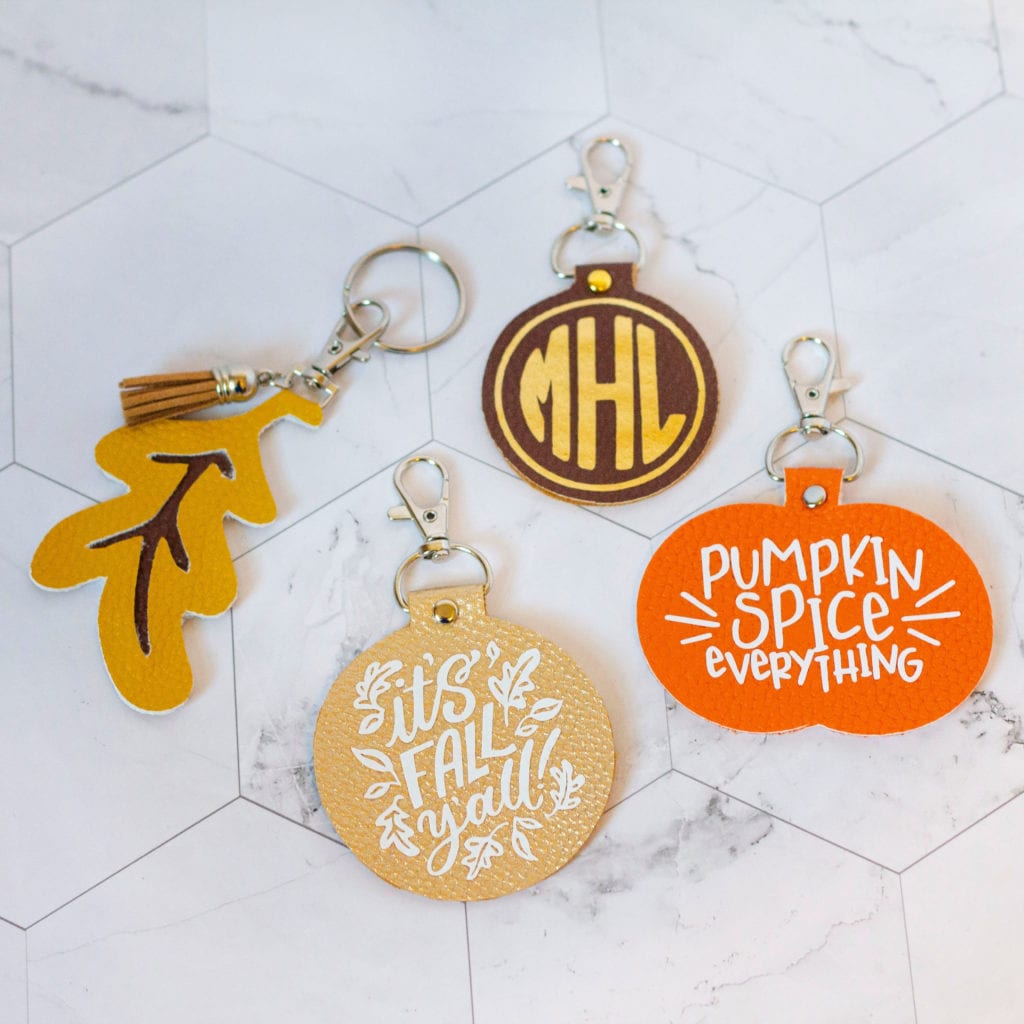
Seasonal Faux Leather Keychains
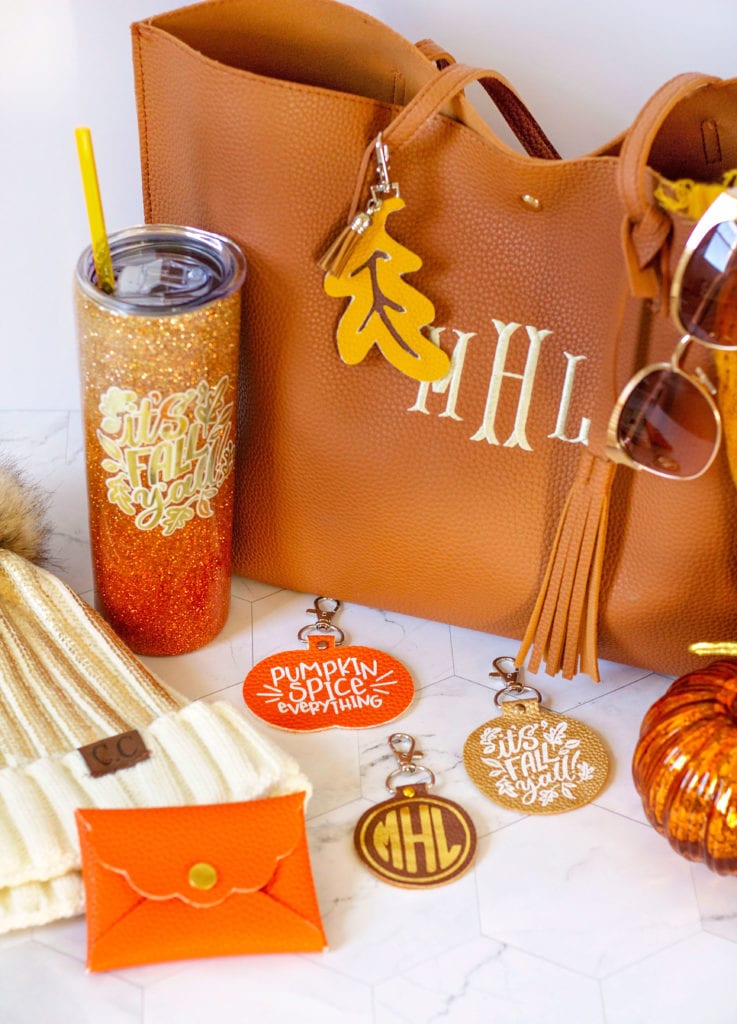
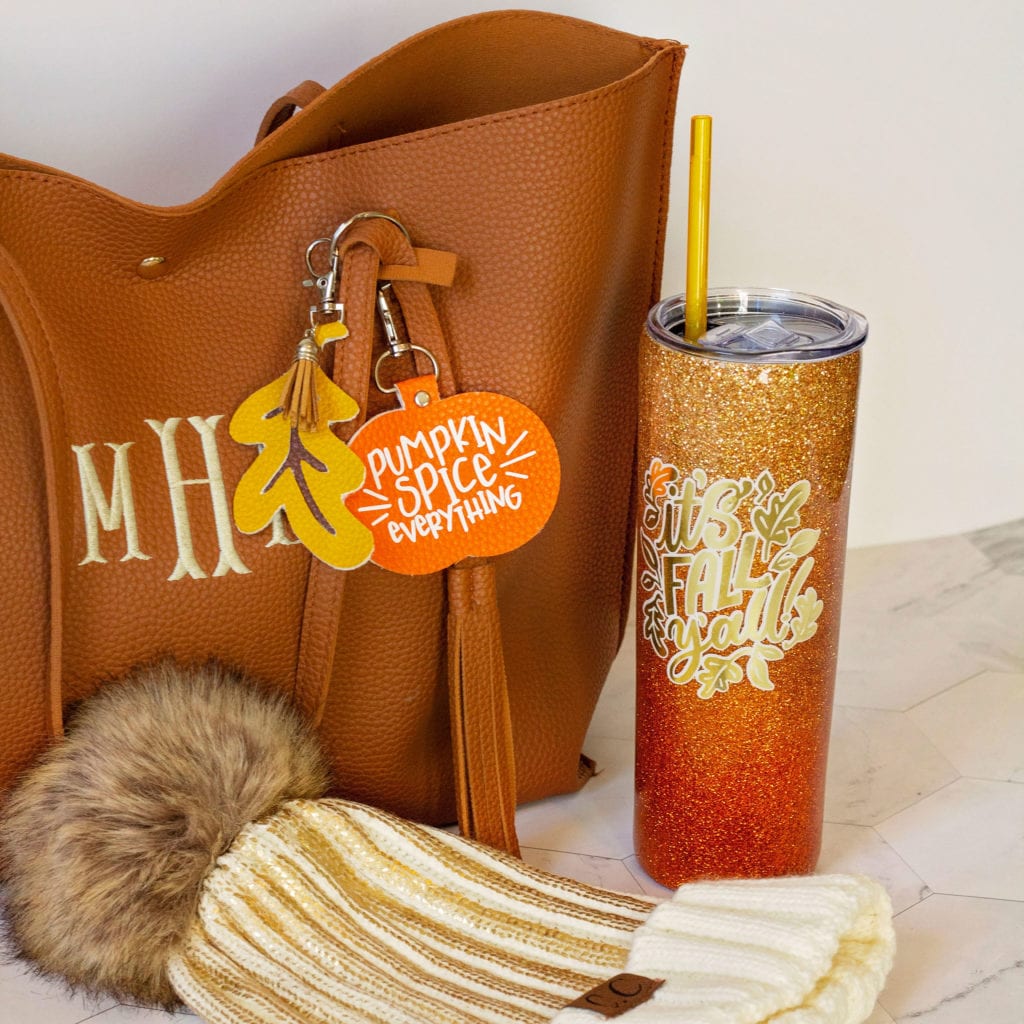
I really love to go all-out for my favorite holidays so creating seasonal faux leather keychains was a no-brainer for me!
I wanted to have a few cute keychains that would complete a fall outfit. So I chose colors that would coordinate with my purse and my “It’s Fall Ya’ll” glitter cup from Nick at Curly Nick Designs
Halloween is my second favorite holiday, so I totally wanted to do a Halloween theme with my keychains!
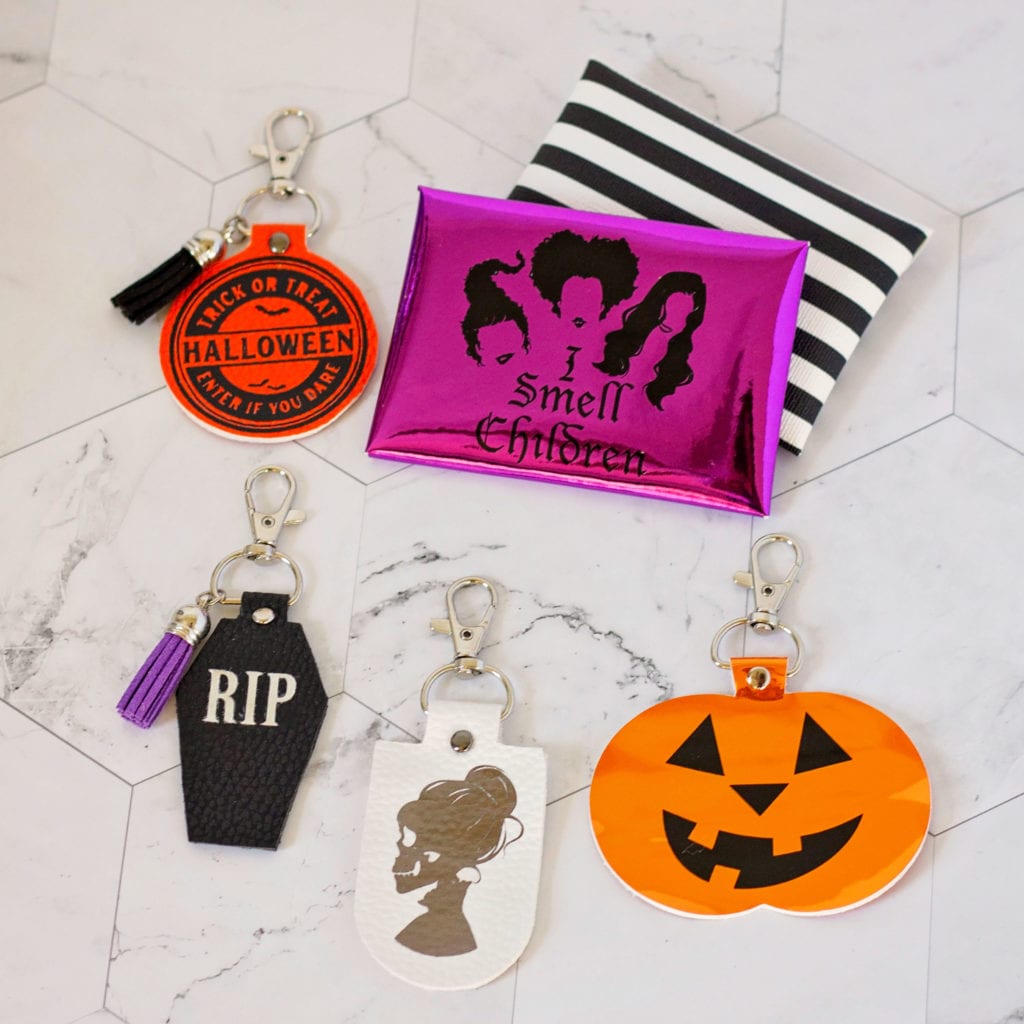
I LOVE the movie Hocus Pocus so I added that theme in there with my Hocus Pocus Glitter Tumbler by Sticky Bottom Designs. And how cute is my Jack O’ Lantern Glitter Straw topper by Mystic Craft Co.?
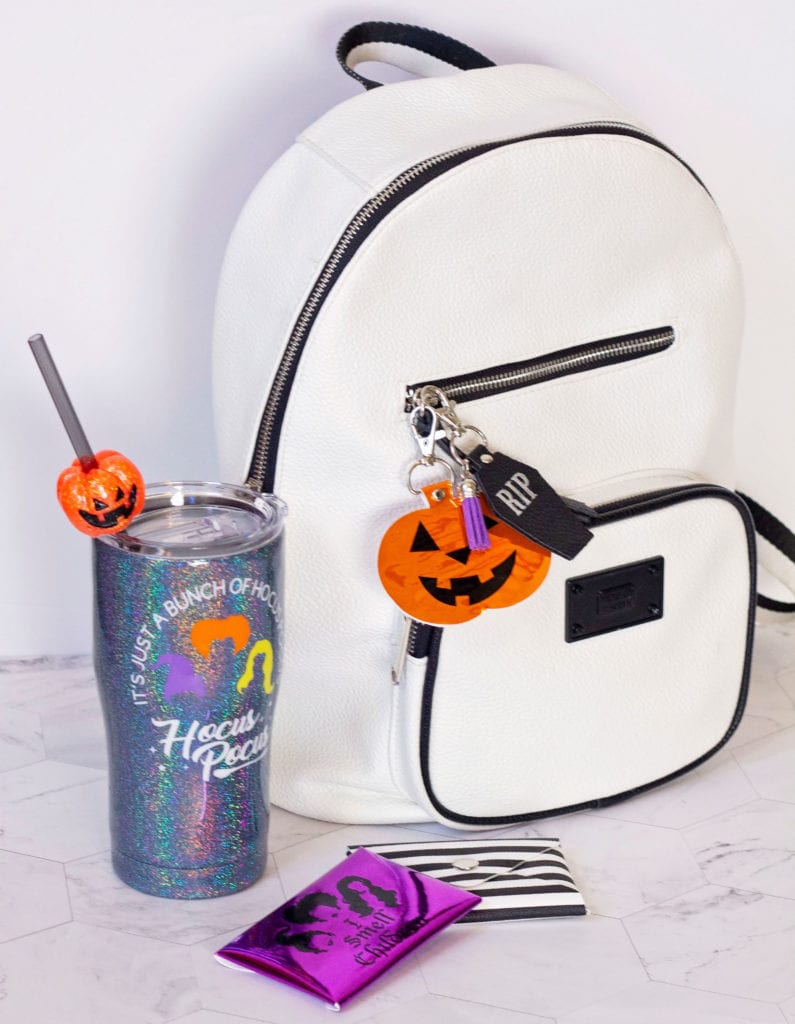
I bought this Coin Purse/Credit Card Holder cut file from an Etsy seller and made coordinating small coin purses for each of the holidays. I think they turned out so cute and they were really easy to make!
I had such a blast creating my Fall and Halloween keychains, I just HAD to create a few Christmas one, too! I just love how they turned out, I’m going to feel so festive during Christmas time!
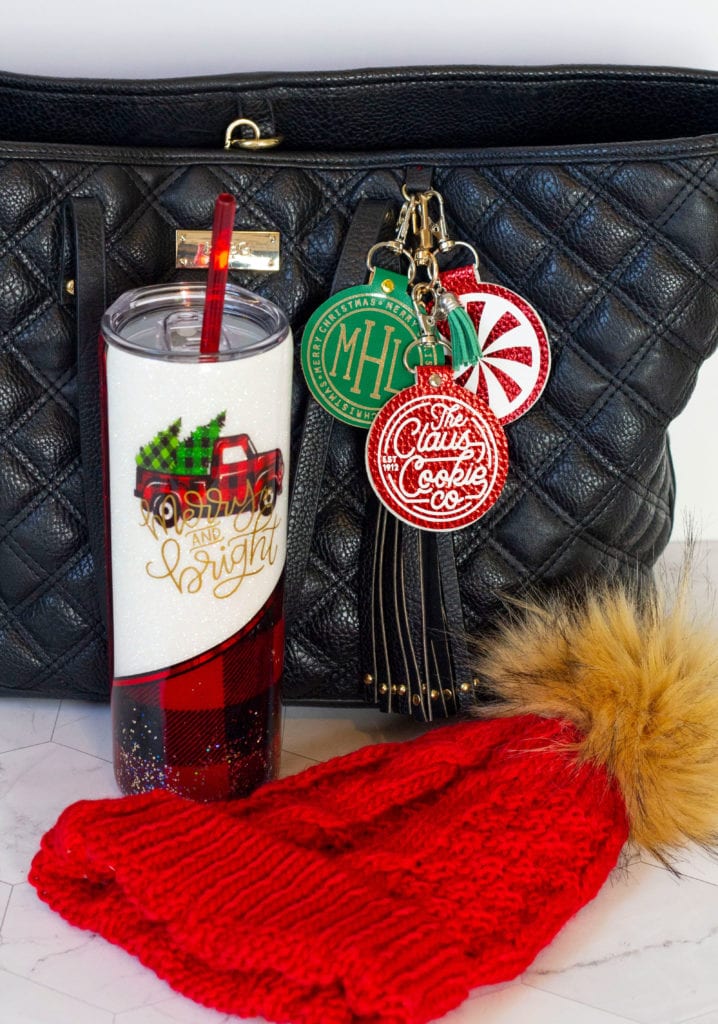
I have been obsessed with buffalo plaid for a few years now so when I saw this darling Buffalo Plaid Glitter Tumbler by Daydra’s Custom Creations, I absolutely fell in love. I wish the pictures did it justice. Doesn’t it fit so well with my keychains?! I can’t wait to plan a date night out on the town with my hubby with all of my cute accessories!
I hope you’ve been inspired to get creative and create your very own leather keychains that make you as happy inside as mine do for me!
All your keychain designs turned out SOO cute! LOVE all the holiday-themed ones! So glad you gave the project a try and totally ran with it! 😍
Thanks for the inspiration Megan!
These are so cute and what a great idea! I made some key fobs with my faux leather, I may just give these a try!