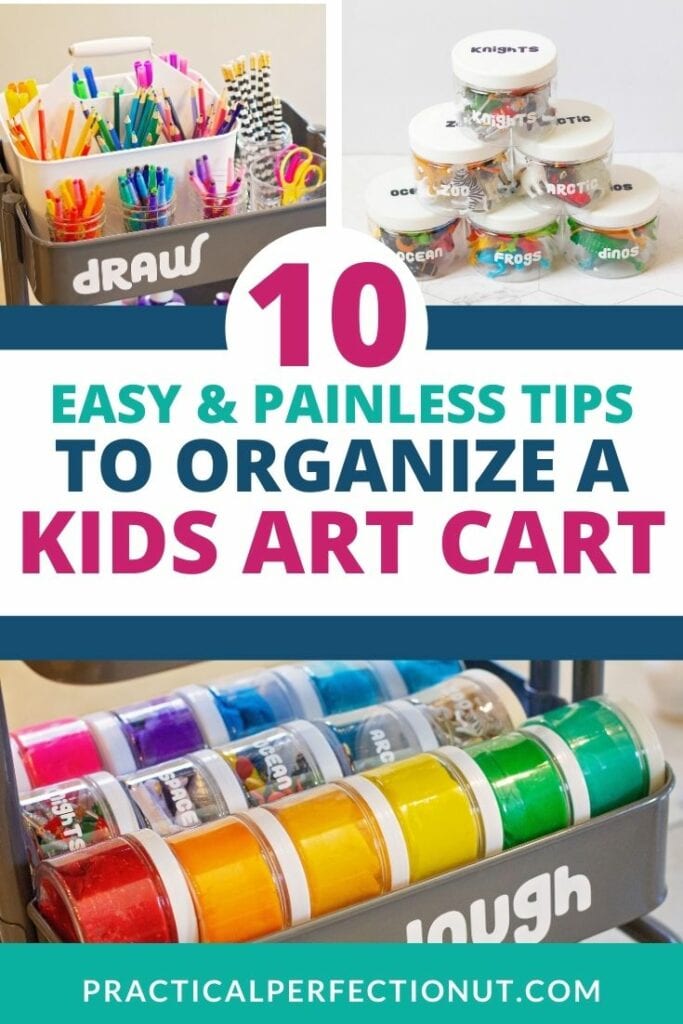
How to Organize a Kids Art Cart
Arts and craft… a kid’s best friend. But generally not a parent’s best friend, right?
Art supplies are notoriously hard to keep organized. And, on top of that, finding a place to store all of those supplies can be difficult, especially if you have don’t have a lot of extra space in your house.
Need more ideas? Check out: The ONLY Chore System You’ll Ever Need! , 7 Mind-Blowing Lego Storage Ideas and How to Create a Summer Schedule for Kids
My favorite solution to this arts and crafts dilemma? A kids art cart.
Using a cart for your art supplies makes it easy to move them around your house. I know that might not sound ideal – who likes the idea of paper and glue scattered throughout every room? But don’t worry, that’s not what I mean.

If you don’t have a specific room or section devoted to crafts, it can be a pain to haul boxes and containers of art supplies to your kitchen table or playroom floor every time your kids want to draw. Having a kids art cart means you can store your cart somewhere out of sight when you’re not using it, and then roll it right up to your table whenever your kids want to use it.
I love my art cart, and if you’re looking for a way to revamp your kids’ art supplies, here’s how you can make your own!
What to Include on Your Kids Art Cart
First things first, what do you even put on a kids art cart? Well, it really depends on what your kids like to do! It’s good to have a variety of things for your kids to choose from, but keep an eye on what your kids use the most. If they aren’t touching certain supplies, take those off the cart and expand a section they love instead.
You can also rotate through your supplies. If they didn’t like something, stick it in a closet for a few months and try again later. Or donate whatever your kids don’t enjoy.
Keep it age-appropriate and let the cart grow with the kids. If your children are young, you can start with a simple cart of drawing supplies. As they get older and their skills improve, you can add more advanced tools and supplies.
The bottom line is… find what works best for your child. Fine-tuning your kids art cart might take time, but here are some ideas to help you get started:
- Paints
- Play dough
- Drawing supplies (pens, pencils, colored pencils, crayons, etc.)
- Sharpeners and staplers (I like the small ones for a kids cart)
- Paper
- Scissors
- Glue and tape
- Stickers
- Textiles (like ribbon)
- Miscellaneous crafting supplies (popsicle sticks, pom-poms, pipe cleaners, etc.)
In the next section I’ll talk about how to organize all of these categories, but keep in mind that an art cart doesn’t have to (and probably won’t!) include all of those items. Pick and choose your kid’s favorites and what they’ll use the most, otherwise you might need more than one cart!
How to Organize Your Kids Art Cart
Now that you’ve got everything you want on your cart, it’s time to cover organization.
One of the most frustrating things about art supplies is the mess they produce. Clean-up time can be a disaster, especially if your kids don’t know where to put everything.
Here are some ways to help keep your kids art cart organized and ensure an easier and less stressful arts and craft time in your home.
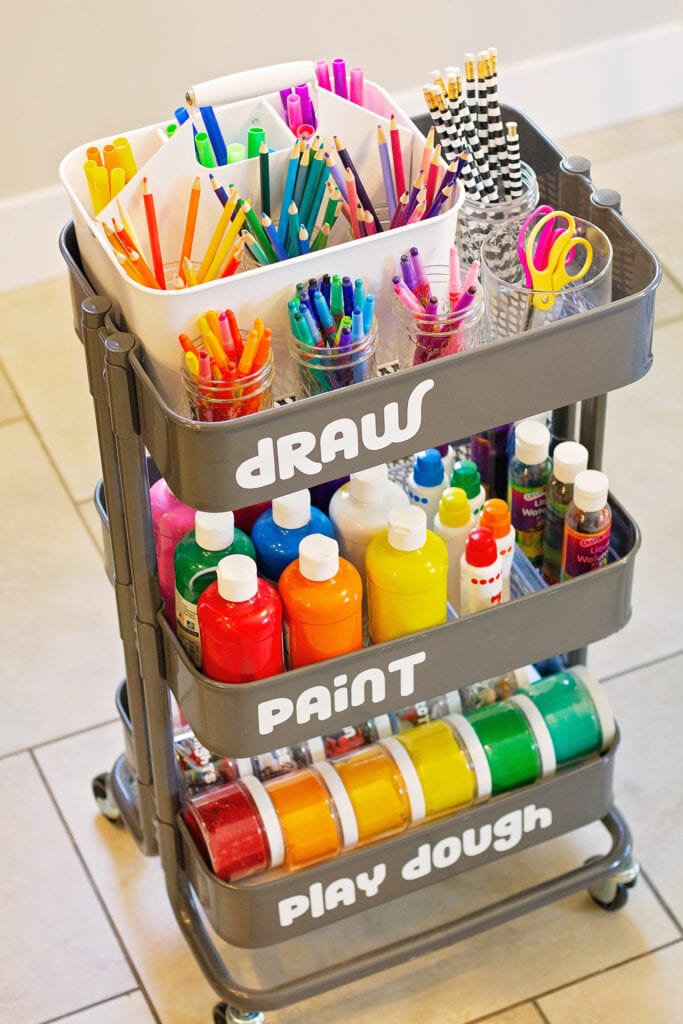
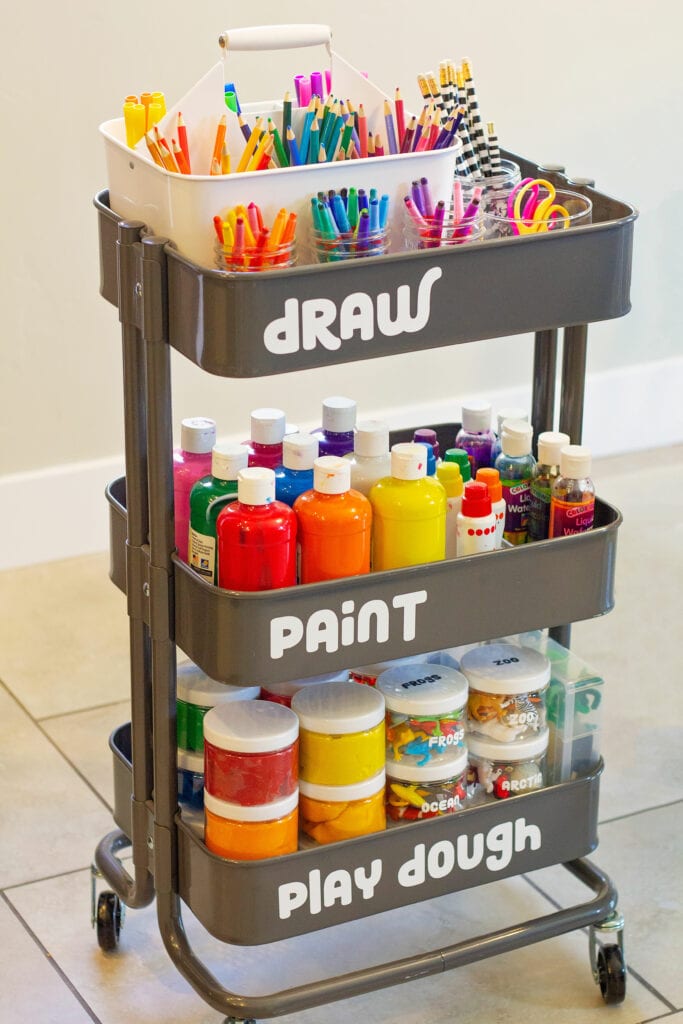
1. Find a cart with multiple tiers.
My cart has three different levels, and each one is totally full. Make sure you find a cart with three levels if possible, but you’ll need at least two for sure.
Also, get a cart with wheels. If your cart doesn’t move, it kind of defeats the purpose of being able to move it wherever you need to.
You should be able to find something that meets these requirements at Ikea, Michael’s, Target, or even Amazon. Most of them will be in the $30-50 price range, so they aren’t too expensive. Plus, it’s totally worth the cost! You’ll get tons of use out of your art cart.
Shop Art Carts:

2. Get lots of different cups, bins, and containers.
Art supplies are tiny and fiddly. They can get lost easily or mixed up with other supplies, so you’ll need tons of different containers for your art cart.
One of the main things to keep in mind when you’re making a kids art cart is to make sure everything is easily accessible. Your kids will create a much smaller mess if they can easily grab everything on the cart. I like to use cups and a divided basket with no lid for items my kids use frequently, and that way my kids can get them out quickly without stacking or unstacking anything.
Of course, you will want lids for some things. Play dough and small items like buttons or pom-poms will do better in a container with a lid, otherwise you’ll risk losing them or drying the play dough out.
If you need extra space, you can also get over-the-shelf cups and bins. You can find bins online or at a container store that you can hook over the edge of your cart to give you lots of extra space if you have supplies that don’t fit on your cart.
Make sure you get a variety of containers, bins, and cups since you have a variety of supplies!
Shop Organizers:
3. Categorize and subcategorize everything.
I cannot stress this enough for an art cart – make as many categories as you can. And then make categories within those categories.
With some projects, the main category is enough… but with an art cart, you want to get as specific as possible. When you have lots of subcategories, it will make it so much easier for you – or your kids, in this case – to find exactly what they need.
On an art cart, you’re going to have tons of things like scissors, pencils, and paper, so if your kids are stuck sifting through piles and piles of supplies to find the one they’re looking for, it won’t be very fun.
Here’s how you can subcategorize your art supplies to help keep your cart organized.
Paints
You can start off with basic kids’ paints (that can wash off clothes easily) but as they get older you can try watercolors too.
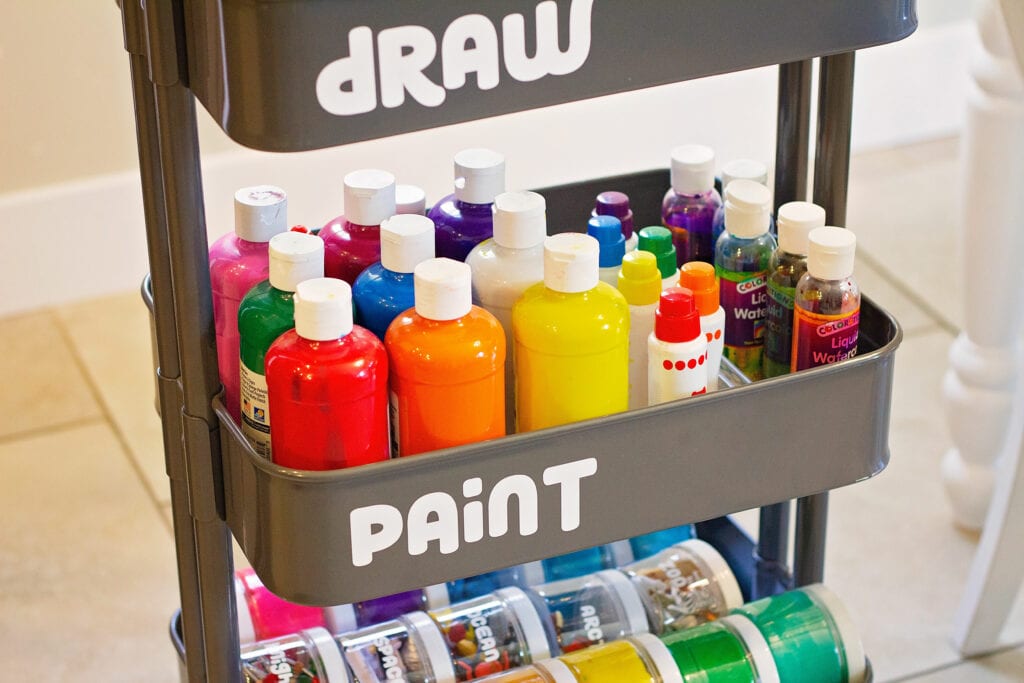
I’ve split up my paints by type to further organize them, so I separate tempera paint from watercolors, and so on. I also like to organize my paints in a rainbow pattern, just because it looks nice and neat, but your kids might not get that intense when they are putting their paint back.
Honestly, if they get it on the right shelf and with the correct paint-type section then it’s a win.
Shop Art Supplies:
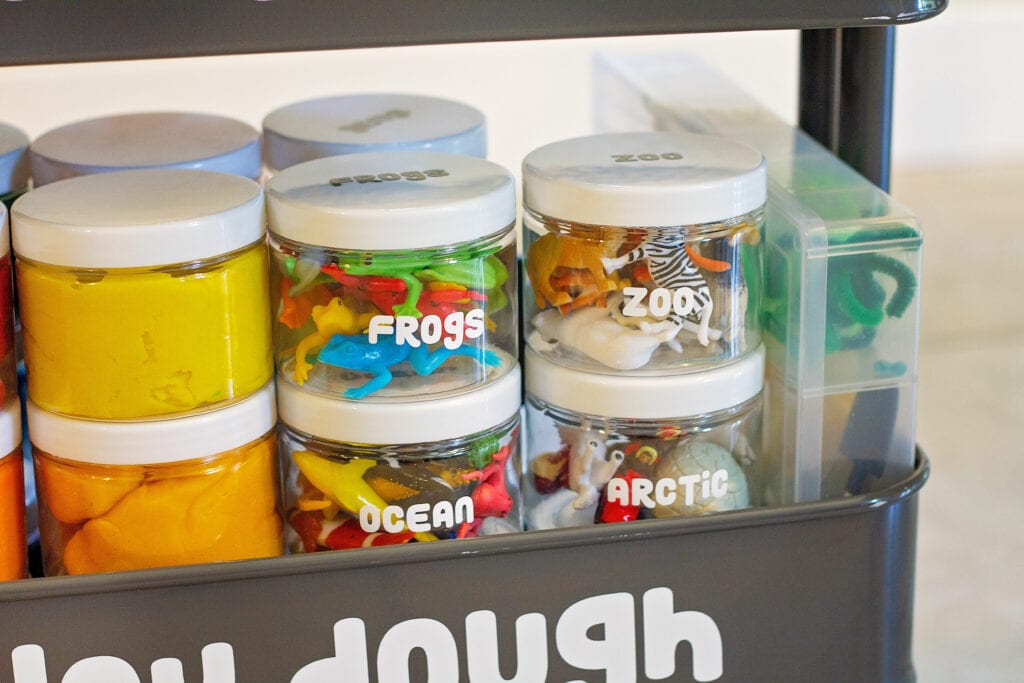
Play Dough
I keep my play dough in a lidded container to keep it from drying out. I have lots of small containers for each color, and I like to use clear containers so my kids can easily see the color they’re grabbing.
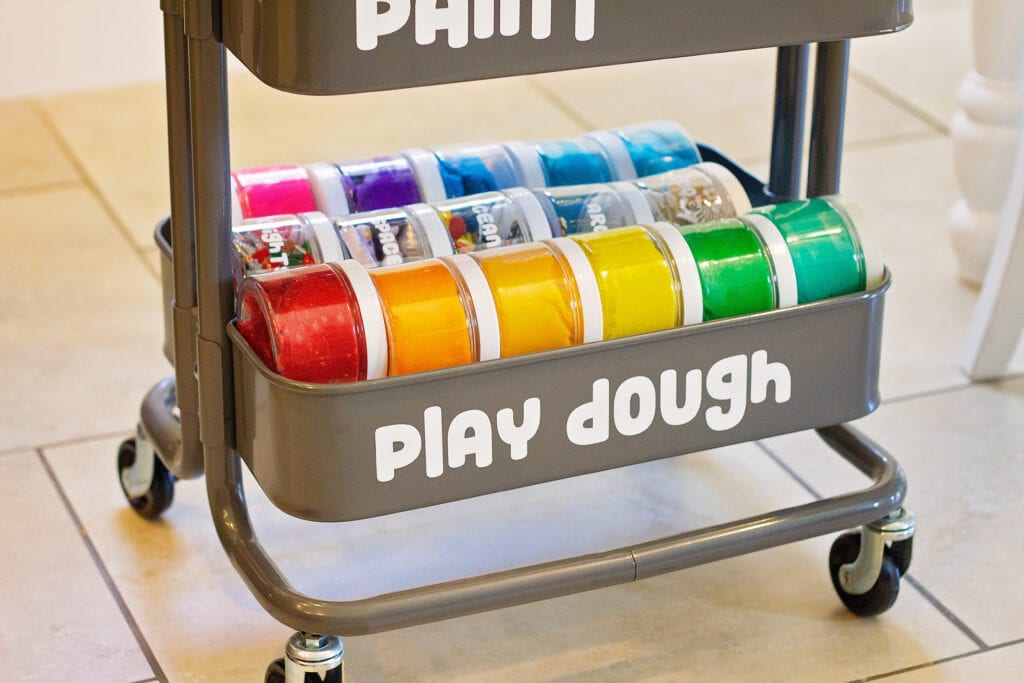
Depending on how you want to organize your cart, you might want to lay your play dough down on its side so your kids can see all of the colors without having to unstack them or crouch down. I’ve organized mine both ways before (stacking and laying them on their side) and they both work! Try them both out and see which you prefer.
Drawing
This will probably be your biggest category. The drawing category covers pens, pencils, colored pencils, crayons, markers, etc.
You will definitely want to subcategorize this section so that all of the crayons are in one container, all of the colored pencils are in another, and regular pencils are in another. I would make sure sharpies, highlighters, and regular markers are all in separate containers as well.
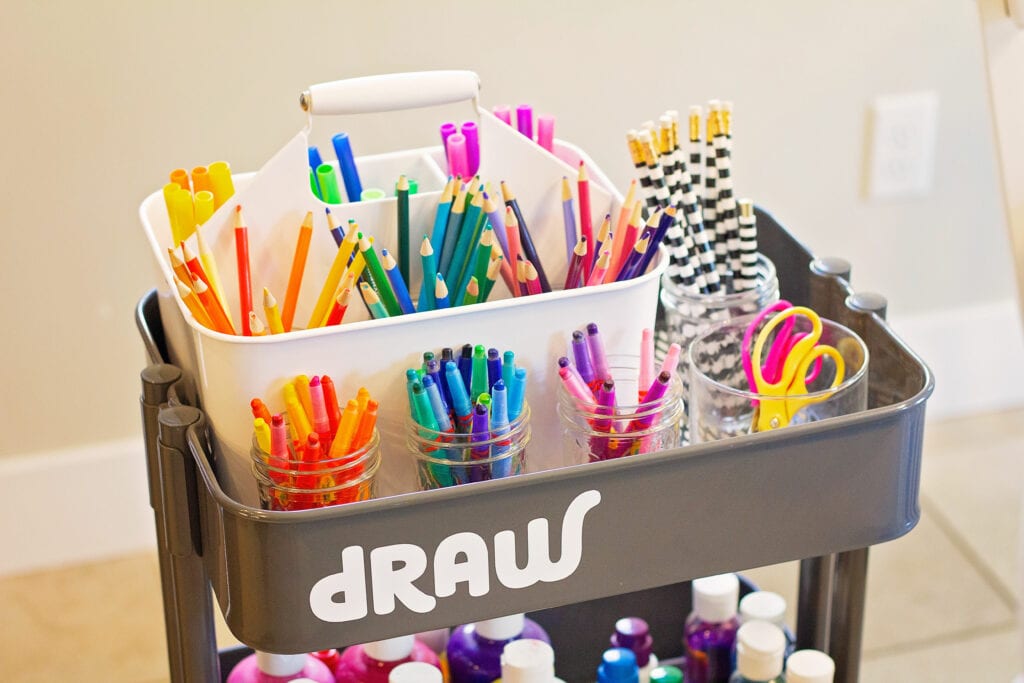
I have a large basket with no lid and several built-in dividers, so I like to put a lot of my drawing supplies in there. I love organizing by color, so I further subcategorize my drawing supplies to keep similar colors together – like pinks and reds in one section, blues and greens in another, and so on. Obviously, you don’t have to go to this extent, but if you have space, it can be fun and pretty to organize this way.
This section will probably take the largest amount of space, and if you’re using cups or a divided basket like me, I’d suggest putting your drawing section on the top shelf of your cart. That way your kids can easily take things out of the cups without worrying about reaching underneath another shelf.
Paper
Split your paper up into separate categories. Make a spot for cardstock, construction paper, scrapbook paper, or other specialty paper like origami or tissue paper.
I would also recommend organizing each of your different paper sections into colors. Most of the time when you buy a new pack of multi-colored paper, it will already be organized, but if you have old stacks of paper that aren’t organized by color, take some time to do that when you’re organizing your kids art cart.
You can separate your paper in tons of different ways, either in separate, stackable containers, or standing up in magazine racks – whatever you have space for. Just make sure they are easy to grab since this is another frequently used item.
You can also keep this section separate completely. If you don’t have space, or your kids use too much paper when they are unsupervised, consider keeping paper in a separate spot only you can reach.
Staplers, Scissors, Tape, and Glue
These items depend a lot on how old your kids are and what they can handle. If your kids are really young, you’ll probably want to keep staplers, scissors, tape, and glue in lidded containers they can’t get into or just keep them off the cart entirely.
If your kids are old enough to safely use these items and won’t be tempted to rub glue all over their hands (who hasn’t made at least one glue hand in their life?) then you can keep these in a few different spots.
I like to keep my scissors on the top shelf with my drawing supplies since scissors are used often in my home. We don’t use staplers that much, but if your kids do, then find a small section where you can keep it with your glue and tape.
Textiles
Most people won’t have a large section of textiles (or any at all if you have a separate area for sewing or fabric crafts) but if you keep any ribbons or material for crafts, make sure you keep a small bin for those items.
Miscellaneous supplies
I keep my miscellaneous supplies (pom poms, pipe cleaners, small toys my kids will use in crafts and games, etc.) in lidded containers on my bottom shelf.
I have a large container with dividers (that is quite thin) which makes it easy to divide up pipe cleaners and other small supplies, and then I can just slip it into the side of my cart.
4. Label every single container.
Labeling is extremely important to organization. Let’s be honest, when your kids are looking for something on your cart, they probably won’t be reading the labels. But labeling will help your kids a lot when it comes to clean-up.

I like to add my labels to both the lid of the container (if it has one) and the front of it. That way, no matter what angle you’re looking from, you can see exactly what’s inside or where to put it back when you’re done.
I even label the shelves of the cart so my kids know what shelf to put their paints or play dough on when they are done playing.
How to Keep Your Kids Art Cart Organized
Let’s talk maintenance. If you’ve read any of my other posts, you’ll know that one of the most important steps in organization is maintenance. After all, maintenance is the step that never really ends.
Art carts, especially a kids art cart, can get disorganized and messy after just one use. That’s why it’s important to find an easy way to keep it organized and neat even after your kids spend hours making fun art projects.
If you’ve labeled everything and tried to organize your cart in sections, it should be easy for your kids to find where everything goes.

Help them the first few times as they get used to the new cart, and then make sure they know that even if it takes a few extra minutes to make sure everything is carefully put back correctly, it’s important to keep the cart neat.
After all, if everything gets put back in the right spot, then it’s easy to find it all next time! Once they get into that habit, the cart should stay fairly tidy, though you might want to look over it once a week just to make sure it’s staying organized. Frequent checks will also help you realize when you need to replace any of your supplies.
Why You Should Use an Art Cart
I hope this post has helped you see that there are so many benefits to using an art cart.
They are super portable, and you don’t have to stack big containers or bins on any much-needed shelf space. No matter how big or small your home is, a little cart designated just for art supplies will help you save a bit of space. And you can just push it into a corner when your kids are all done!
Also, because the carts usually aren’t too tall, they are easily accessible to your kids while they are making their arts and crafts.
I love my kids art cart, and I think you’ll love yours too!