8 Easy Steps to Organize a Junk Drawer in 20 Minutes
Junk drawers. We all have them. Some of us might have more than just one, but don’t worry – no one is judging here.
Often, when we organize our homes, we assume that organization doesn’t extend to the junk drawer. I mean, it’s a junk drawer… it’s not supposed to be neat, right?
Unfortunately, wrong.
Need more ideas? How to Fold a Fitted Sheet + A Video! and How to Get Rid of Stuff: 10 Steps to Help You Let Go!
Organizing your junk drawer is one of the most helpful things you can do for a functional and efficient home. Even though it’s called a junk drawer, usually it’s filled with essential and useful items that just don’t really have space anywhere else.

Combing through your junk drawer to find that rubber band or Sharpie you need is so frustrating, especially when you finally track down the marker you wanted only to find that it’s dry and unusable.
To save you (and your sanity) from that annoying experience, here are some easy steps to help you organize a junk drawer.

8 Easy Steps to Organize a Junk Drawer in 20 Minutes
1. Throw out the junk in your junk drawer.
We’ve already established that your junk drawer isn’t actually junk, right? Or at least, it shouldn’t be junk. It’s more of a miscellaneous drawer, but who wants to call it that?
If you have any actual junk in your drawer, toss it. I mean random papers that have gotten shoved in there, old pens that don’t work anymore, random business cards you’ve never looked at – anything you don’t use.
Be realistic as you’re going through your drawer. I know there are things we want to keep just in case we might use them someday, but if you haven’t used it in the last 6 months, you probably won’t in the future either.
2. Find new homes for some of your items.
This goes along with decluttering, but I wanted to really stress this one.
If there are some random items that don’t really make sense in the junk drawer, but you do want to keep them, then see if you can move them to a new spot in your house.
Any screwdrivers that got shoved in the junk drawer? Put those back in the toolbox. Do you have a drawer of important paperwork? File those receipts and business cards there instead.
If you need a place to collect coupons, consider whether or not your junk drawer is the best place for that. If it is, that’s fine – we’ll cover how to keep those things organized later on. But if you can put them in a small bag or pouch in a filing cabinet, then maybe that’s a better option.
I try to keep anything paper related out of my junk drawer. Other than post-its or notepads I use on a regular basis, I put paper items like coupons, receipts, business cards, and important mail in a separate place.
This will help keep your drawer organized, and it’ll help you find those documents easily later on (if you’ve organized your filing drawer, that is).

3. Sort and categorize everything.
Every time you organize, decluttering is always followed by sorting and categorizing.
Ideally, as you’ve been purging your drawer of the junk you don’t need, you’ve been taking everything out of your junk drawer as well.
With your drawer nice and empty, and your counter littered with random items, it’s time to categorize.
Look at what do you have. Everyone’s junk drawers will be a bit different. You might have a ton of coupons and you don’t know where else to put them. Or you might have piles and piles of pens. That’s all fine! Just arrange them into piles of similar items.
4. Use dividers.
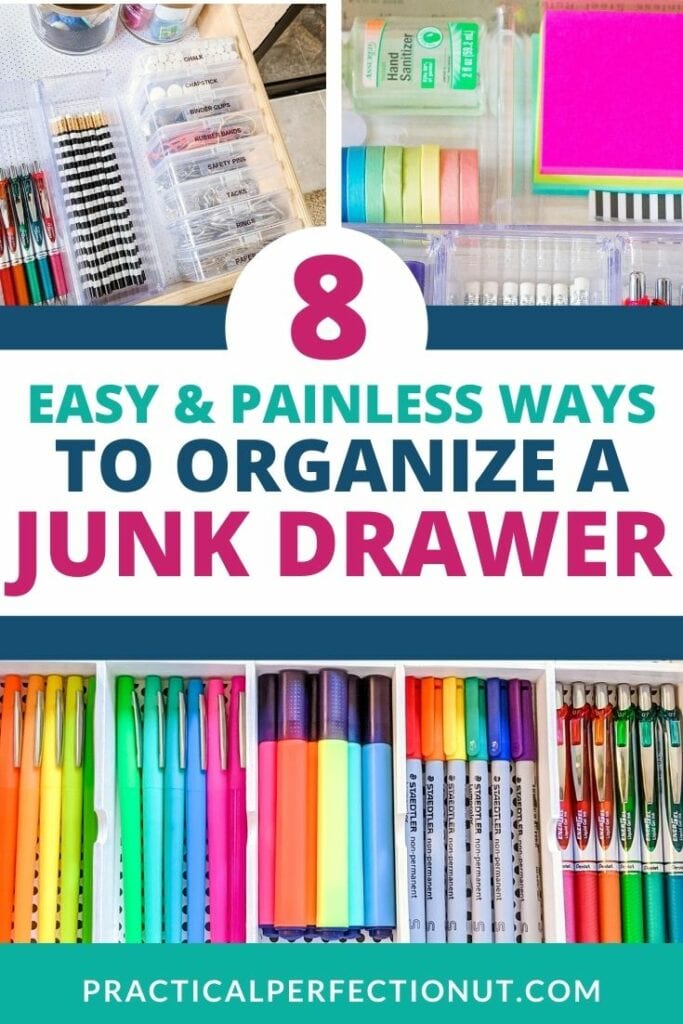
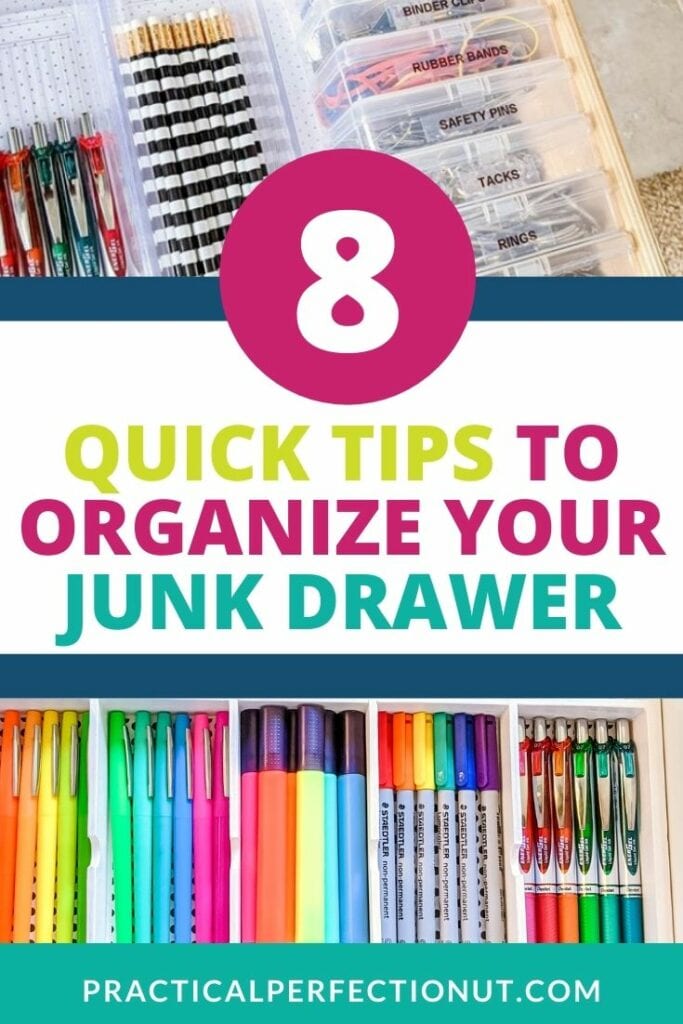
Now that you’ve arranged your things into different categories, you need small containers or dividers to keep your drawer organized.
I love the look of clear, plastic containers. That way you can easily see what’s inside each one. (You can find some on Amazon, at The Container Store, or at almost any store that sells home goods.)
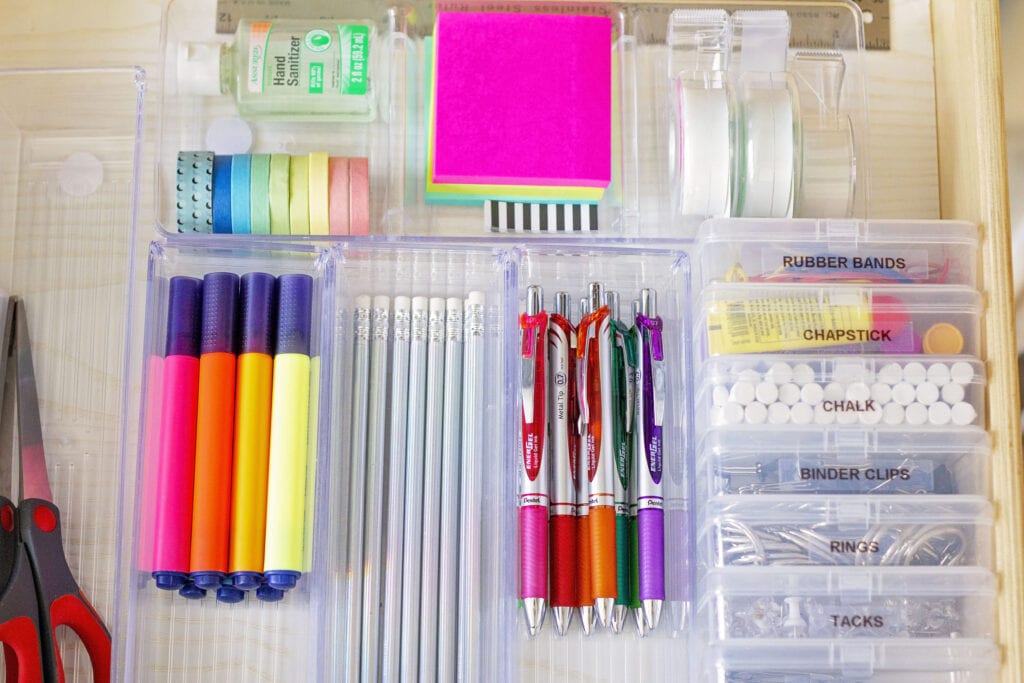
I like using long, skinny containers without a lid for things like pens, pencils, highlighters, and scissors. You can also find a bin that has dividers built into it. Then you have can have some smaller sections for more specific items like tape, sticky notes, or glue.
Even if you only have one single pair of scissors in your drawer, get a container for it. One of the worst things about a junk drawer is having loose items shuffle around each time you open and close your drawer. That’s how it got messy in the first place!
Remember, your junk drawer might look a lot different from mine. Don’t worry about that!
Everyone has different items they like to keep in their junk drawers. If you want a small section for coupons, then make one. Do you keep spare change in the junk drawer? That’s fine, just make sure you keep it all together in a small container.
Find containers that will function for you and your drawer. You might want to just get several bins in different sizes and see what works best, and then return what you don’t use.
5. Don’t shy away from two tiers if have extra items.
If you have lots of stuff in your junk drawer and one level just won’t cut it, then find containers with lids that you can stack, or get a two-tier system that can help you stay organized.
The last thing we want while you organize a junk drawer is to cram your containers full of items just to get it all to fit. That will just leave your drawer looking cluttered. Maybe slightly less cluttered than before, but still a bit too messy.
6. Label each section.
Sometimes labeling everything might feel a bit silly or time-consuming, especially in a place like your junk drawer. But labeling is an important step, and if you want to truly organize a junk drawer efficiently, you can’t skip it.
When you’ve labeled your containers, not only do you know exactly what’s in each container, but it will make it easier to find smaller items like safety pins or paper clips. It should also help your kids put things back in the right spot as well.
Sometimes when we organize, we find a system that makes sense to us and we know where everything goes within that system we’ve designed. But labeling helps make the organization clear and accessible to everyone in the home. And that’s what will help you going forward.
Labeling keeps you and your family accountable.
If you’ve labeled everything, you’re not going to want to just throw chapstick into your drawer, because you’ve created a nice little section for it. Once you’ve created these sections for your items, you’ll want to take a few extra seconds to make sure you’re putting things back in the right spot.
7. Work on maintaining the drawer.
What’s the most important part of organizing? Well, probably decluttering. But what’s the most important part of organizing in the long run? Maintenance!
After organizing your junk drawer, you want to maintain it. Even though it’s just one small drawer and it doesn’t take too long to organize, you don’t want to keep doing this every couple of weeks.
Once you’ve created sections for each item and labeled everything, then it should be pretty easy to maintain it. Keep yourself accountable and make sure you don’t throw in anything that doesn’t fit in your sections.
If you find you have a new item that doesn’t have a section in your drawer, but you don’t have anywhere else to put it, then reconfigure your junk drawer to fit it.
Reorganizing your junk drawer every once in a while isn’t a bad thing. Don’t feel guilty if your drawer does get messy again. Organizing is an ongoing process! But if you and your family are trying to maintain it, your junk drawer will stay organized and clutter-free for a long time.

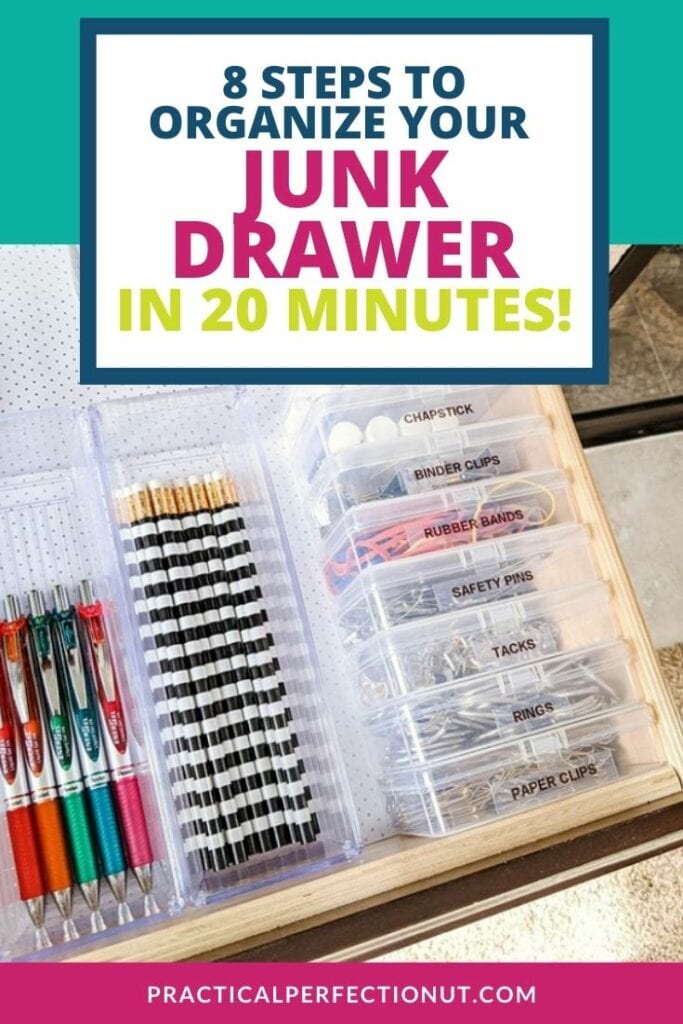
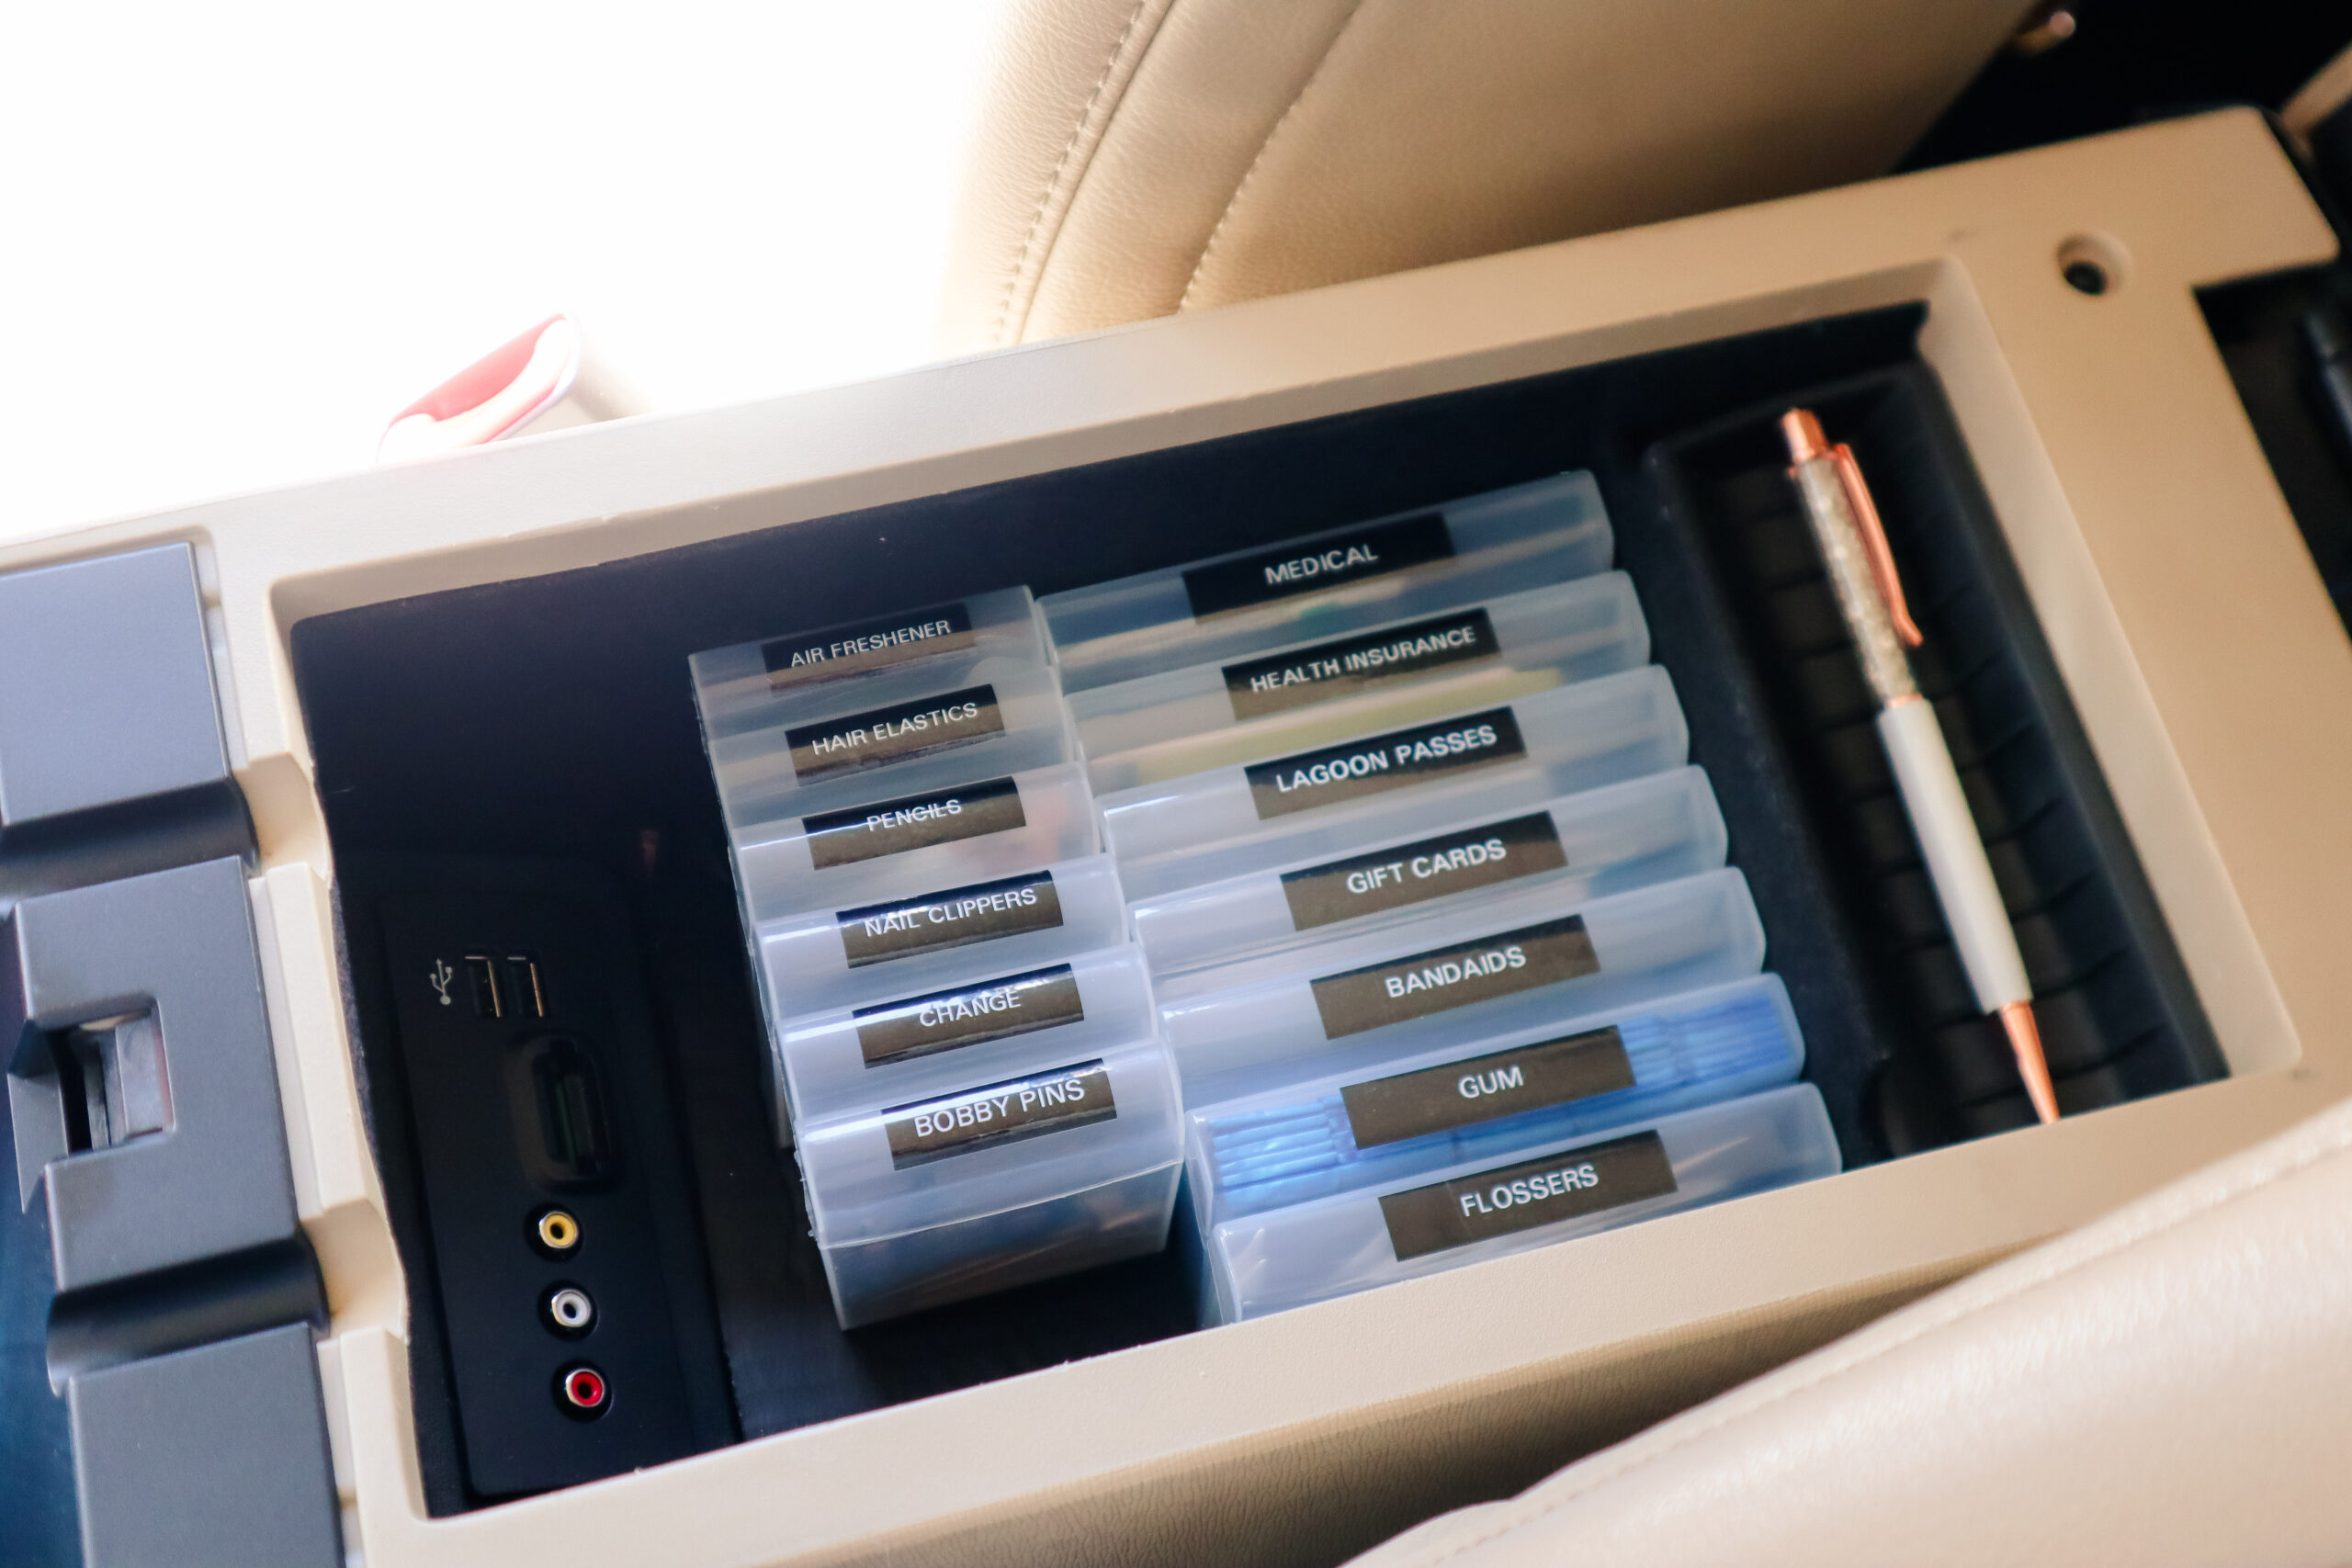
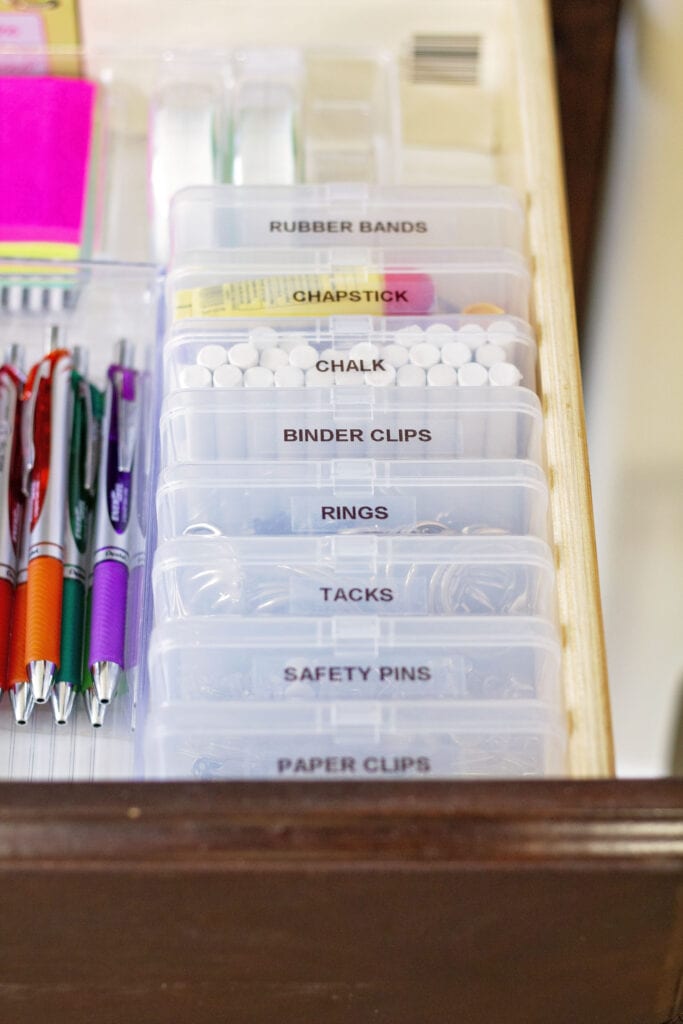
8. Use Vertical Space When you Organize a Junk Drawer
If you look at the photo above, you can see that I have used clear bead containers to hold small items such a paper clips, tacks, safety pins, and rubber bands. The only difference is that instead of storing the box horizontally, I store it vertically!
This saves TONS of space and I am happy to report that the drawer stays organized like this all the time because of these containers. I’m also able to store a lot more things in the drawer because of how the space is used.
4 Things in Your Junk Drawer You Can Throw Out Right Now
- Pens, markers, or highlighters that don’t work.
- Sauce packets from your favorite restaurant. I know you swear you’ll use them someday, but let’s face it. You probably won’t.
- Any trash. I know this seems obvious, but it’ll surprise you how many little pieces of trash can get in your drawer! This includes wrappers, old batteries, and anything that’s broken.
- Empty gift cards. I’d suggest checking the balance on those gift cards before you throw them out, and if they do have a balance left then put them in your wallet. They won’t do anyone any good sitting in your junk drawer.
And that’s how you organize a junk drawer! Not too painful, right?
Find a time this week to spend 20 minutes reorganizing your junk drawer. It’s a quick and easy step towards turning your house into an organized and clutter-free home.